

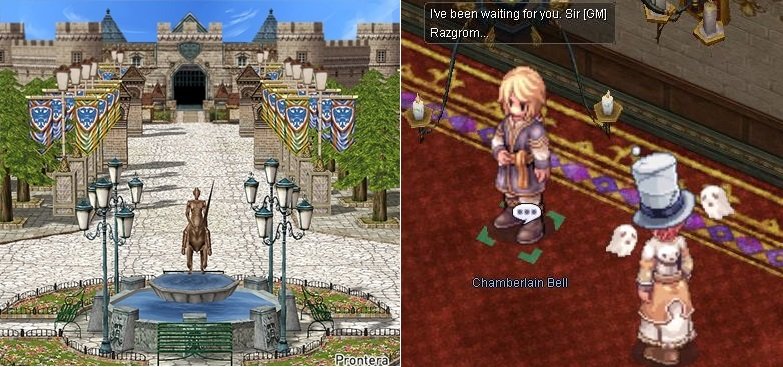
[GM] Razgrom
-
Posts
367 -
Joined
-
Last visited
-
Days Won
27
Content Type
Profiles
Forums
Articles
Blogs
Calendar
Posts posted by [GM] Razgrom
-
-
Quest Prerequisite(s): Invitation to Royal Banquet
1.Talk to Friedrich S. Heine (prt_cas_q 21 83)
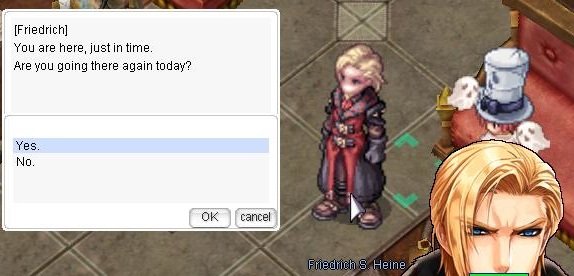
2. Talk to Chamberlain Bell (prt_cas_q 26 30) and choose Call Nillem.
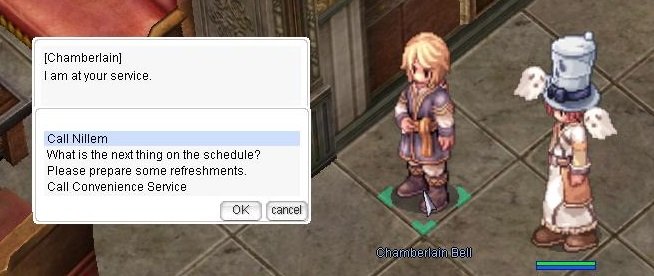
3. Talk to Court Mage Nillem (prt_cas_q 28 28).
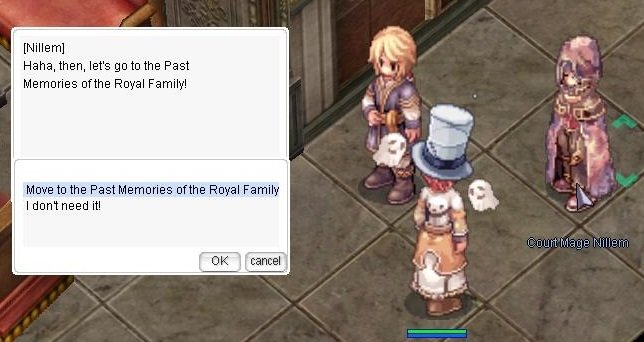
or
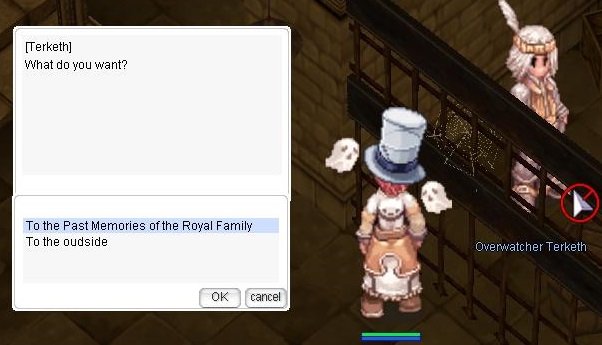
Talk to Overwatcher Terketh (prt_pri00 55 128).
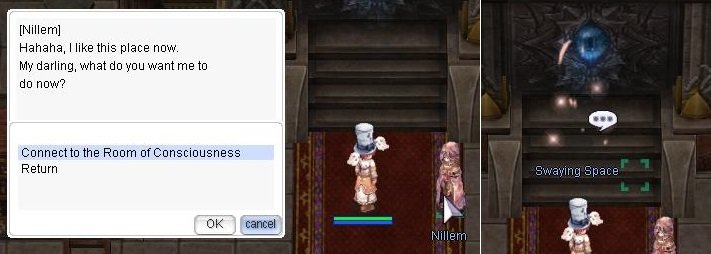
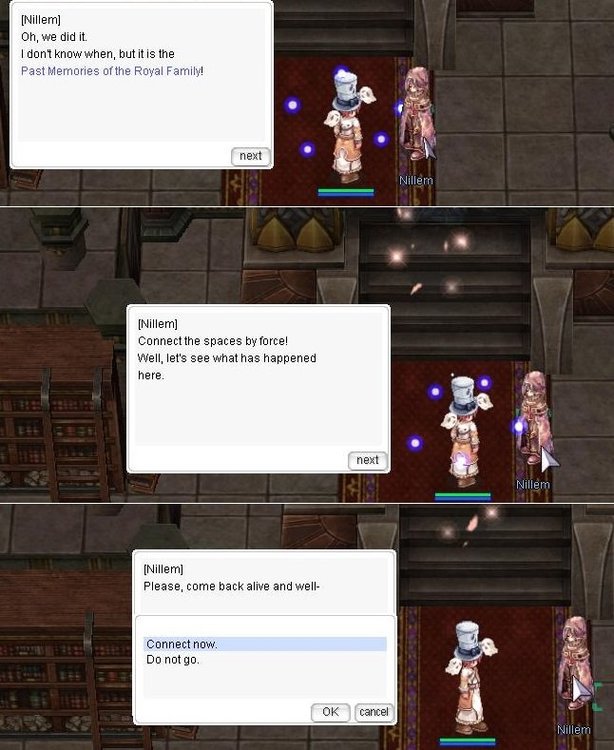
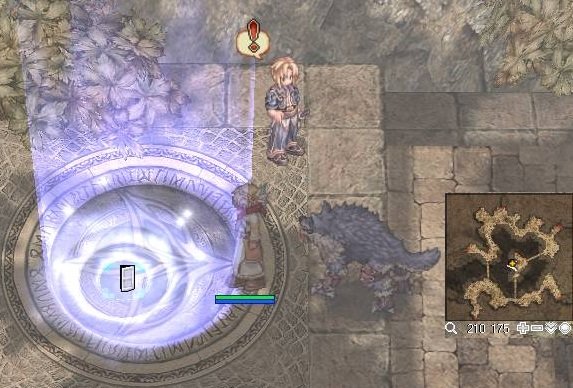
4. Once inside the Royal Memory, talk to Mage Nillem again and a Dimensional Warper appears.
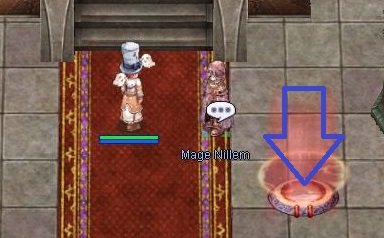
5. Talk to Nillem to reserve the instance, then the Swaying Space to start the instance.
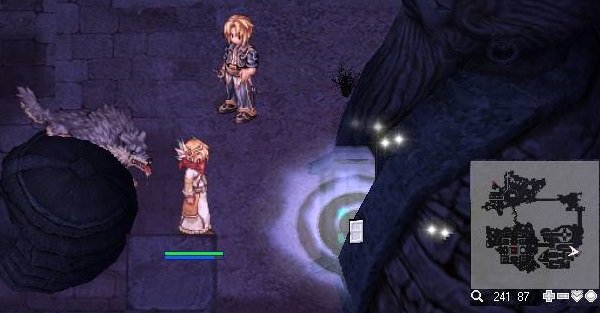
6. Talk to Fenrir at the entrance.

7. Walk up to the altar and talk to Iris. They find a Ymir Heart piece, as a small number of mildly weak skeletons.

8. Once the waves of monsters are done, speak with Iris again.

9. It will spawn a Renovated Amdarais.
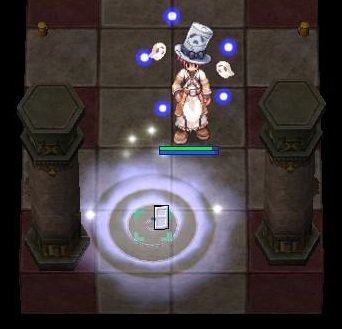
10. Talk to Iris once it's defeated, and then Bijou will attack you herself. She'll attack you with a very weak version of herself.

11. Then talk to Fenrir. Bijou will attack again with her normal boss self.
You can lure the monsters to Iris and Fenrir, and they will do a small portion of damage to the bosses!
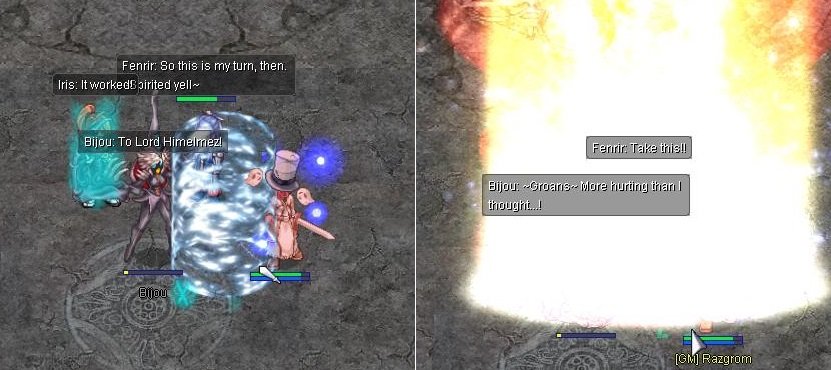
12. After defeating Bijou, talk to Iris to exit the instance.
13. Leave the Old Memoir of Royal Family room by exiting down the hall to the west. You will be warped to Destroyed Prontera.
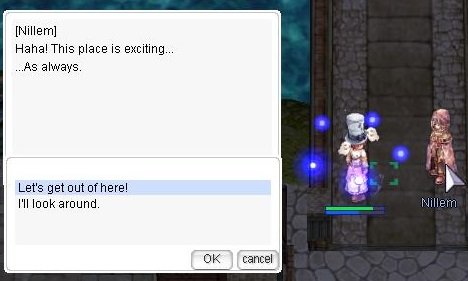
14. Talk to Nillem
On the first pass choose:
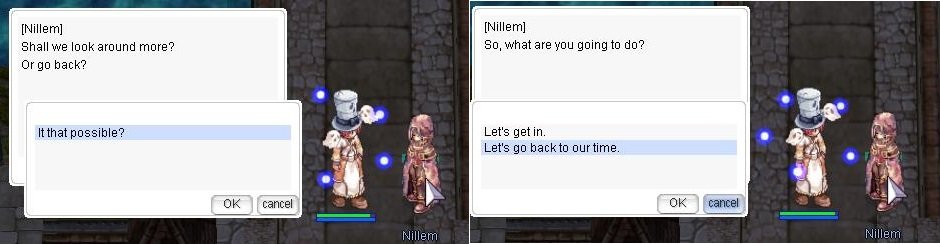
After the first pass choose:
15. On the first pass check Invitation to Royal Banquet p.34
Return to Friedrich S. Heine, receive 10 x Honor Token
 , 2 000 000 Base Exp + 2 000 000 Job Exp.
-
Note1: You can not reenter this instance if you happen to exit this instance before the instance done (e.g. disconnected, died then respawn). It is suggested to bring Token of Siegfried in case you die on the middle of the instance.
Note2: Although the quest itself doesn't offer an Item Reward, all the enemies inside this dungeon have the chance to drop Food Items Lv3 to 7 (+7 Foods are only dropped by Doyen Irene (MVP)
Note3: All monsters in this instance are either Demi-Human or Beast, being the first the most common. None of them uses skills: only melee.
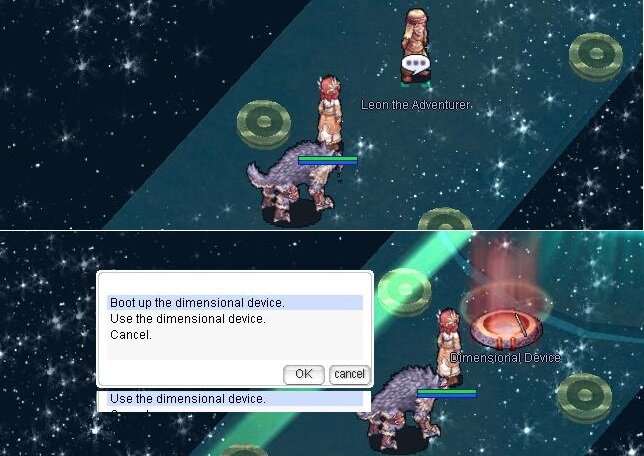
1. To start this quest, you have to use the Dimensional Device located on Rune Midgard Allied Forces Post within the New World. It will warp you into the Dimensional Gap.
2. Talk to Leon the Adventurer in Dimensional Gap to start the quest.
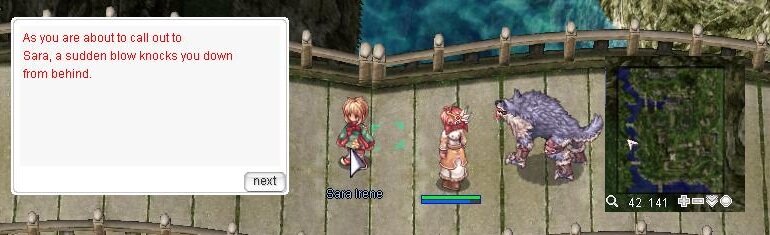
3. Talk to Sara Irene to start (Story starts with conversation between Sara Irene and you taking place and later Doyen her father appears before long. After Sara and Doyen disappears, Strange Oldman A and B conspire plot toward Sara).
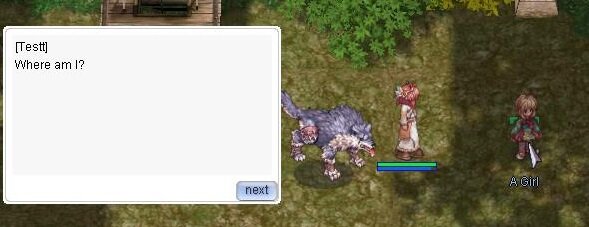
4. As soon as all the conversations end, walk toward the nearest warp portal on your left and you'll appear on the upper left corner of Payon town.
5. Talk to Sara Irene again, she'll disappear and guards/monsters will spawn/appear. Defeat guards and monsters.
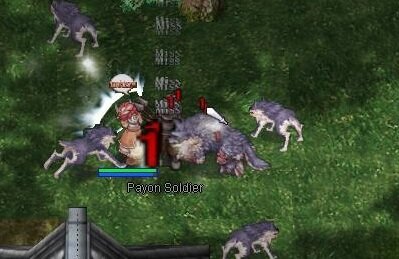
6. Continue to look around for Sara Irene and defeat those monsters. You should be moving in direction as below:
- First section: Kill all guards and wolfs, the portal to second section will open in upper eastern side.
- Second section: Kill all guards and desert wolfs, the portal to third section will open in southern side.
- Third section: Kill all guards, wolfs and desert wolfs, the portal to fourth section will open at northern center side.
- Fourth section: Kill all guards. The portal to fifth section will open at upper west side.
- Fifth section: Talk to Sara Irene, kill all guards, then defeat Doyen Irene. Talk to Doyen again, then start walking west until you meet Sara.
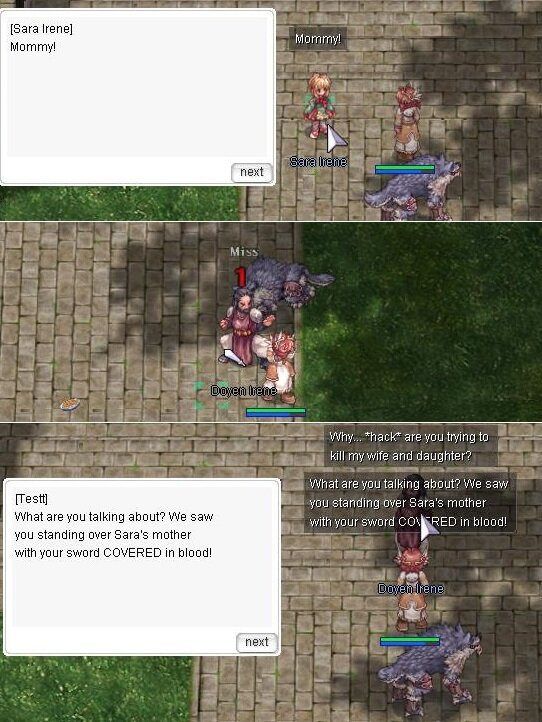
7. Talk to Sara Irene. Then the exit portal will open at western side.
8. Talk to Leon the Adventurer again. Receive 3 850 000 Base Exp + 5 000 000 Job Exp.
-
Quest Prerequisite(s): Invitation to Royal Banquet
1. The Love Story.
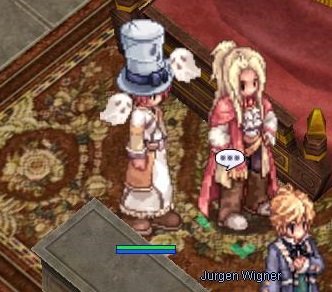
1.1 Speak with Jurgen Wigner and she will ask you to deliver a message to the Maid.

1.2 Find Maid in the Kitchen.

1.3 Then go back to Jurgen Wigner, and he will ask you to hunt 15 x Sea Stones
 ( dropped by Medusa beach_dun only if the quest is taken) and 1 x Witherless Rose
  .
.
1.4 After you gather those items, bring them to the Maid.
1.5 The maid will turn Jurgen down, and you need to speak with Jurgen, he will reward you with 4 x Honor Token
 1 000 000 Base exp + 1 000 000 Job exp.
2. Jewel and Cloth
2.1 Speak to Agnes inside the Rougenbourg residence.
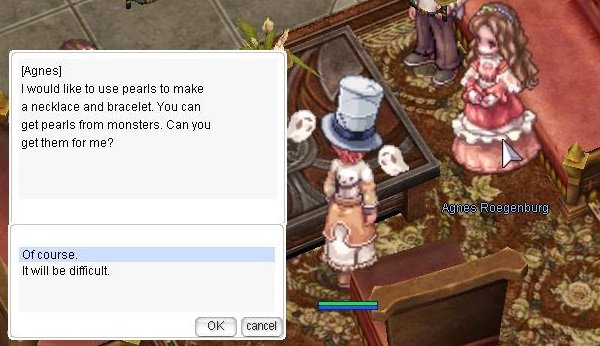
2.2 She asks you to get her some jewels and feathers:
2.3 Return to Agnes with requested item to get 4 x Honor Token
1 000 000 Base exp + 1 000 000 Job exp and access to the The Dress daily quest.
Note! Everyday, she will ask for some items:
case 1: 5 x Fancy Fairy Wing

case 2: 15 x Soft silk
 / 30 x Red Herb
  / 10 x White Herb
case 3: 5 x Beautiful Flower
 / 5 x Mysterious Flower
  / 5 x Elegant Flower
case 4: 20 x Piece of Black Cloth

case 5: 20 x Burning Hair

case 6: 5 x Star Dust

3. Hope You Cannot Let Go
3.1 Speak to Friedrich S. Heine in Heine Family Room. He will ask you to kill Bijou in Room of Consciousness instance.
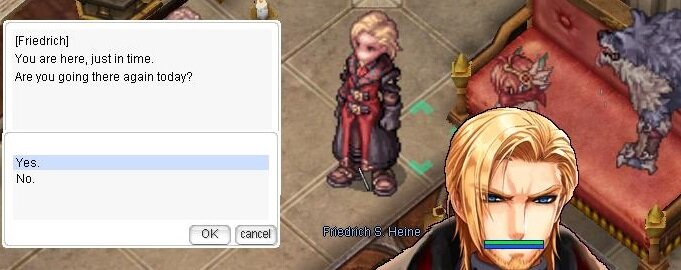
3.2 Return to Friedrich S. Heine for 10 x Honor Token
2 000 000 Base exp + 2 000 000 Job exp reward.
-
Quest Prerequisite(s): Invitation to Royal Banquet
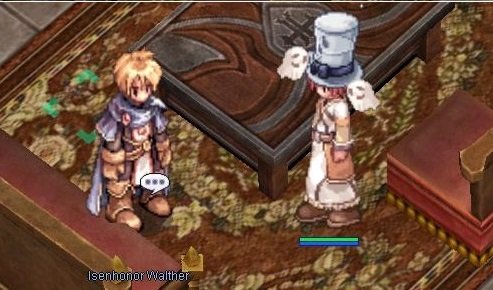
1. Walther Sidequest: The Secret Letter.
- Talk to Isenhonor, he asks you to visit his manor in Alberta to find his Guardian Knight.
- Go to southwest Alberta, next to the Merchant Guild. Speak to Butler for the Walthers (alberta 48 30) and tells you the knight is near the docks.

- Talk to Guardian Knight (alberta 187 147) there. He asks you to visit bigfoot on prison.
- Visit the Royal Prontera Prison via the Banquet Hall room. Bigfoot (prt_pri00 55 119) is in the second jail cell. He asks you to give 1 x Green Salad
 and 3 x Spicy Fried Bao
  ( Sara's Memory ).

- Return to Bigfoot with the food, and he will tell you about a Walther family member he spotted in Veins as well as his skills he's developed from pickpocketing.
- Find K who is Kain Walther Walker (veins 156 160). He will explain about the death of Isenarm by Isenhonor and his connection.
- Deliver the letter to Isenhonor Walther in the Walther's room, receive 10 x Honor Token
 5 000 000 Base exp + 2 500 000 Job exp.
2. Wigner Sidequest: The Maid and the Jewelry Box
- Talk to Levuiere Wigner
- Talk to Katrin Wigner and she says she lost something like a jewelery box. They believe it might have been taken by the maid.

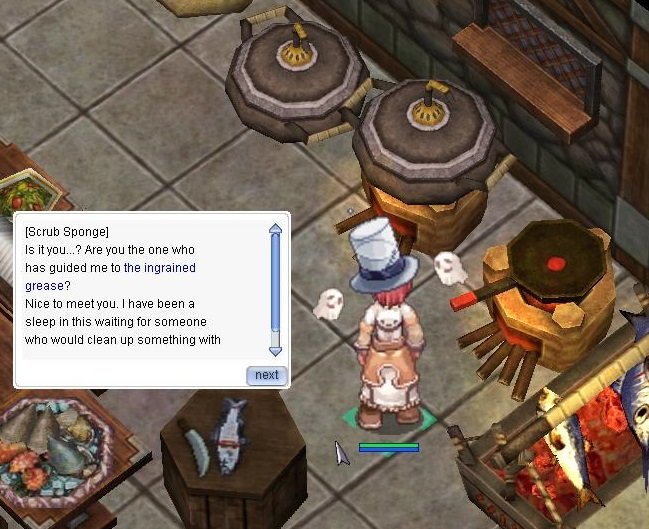
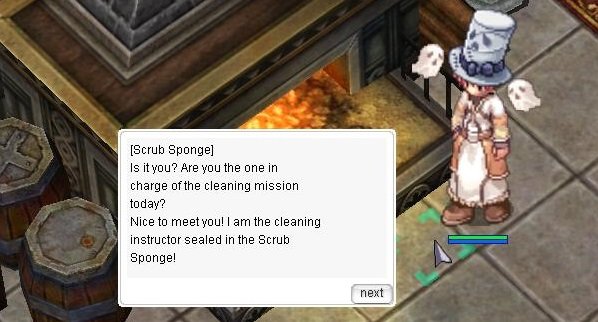
- Talk to Maid (prt_cas 322 216 Kitchen) is in the back of the room. She starts to become very defensive. If you help her clean the kitchen, she may remember if someone else was in the room.
- Walk up to the corner of the room and the sponge will come alive! Or click the Dark and Damp Wall which is right on the basket of bread on the right.
It says you also need 1 x Holy Water(craft)
 and 1 x Mould Powder
  .
.

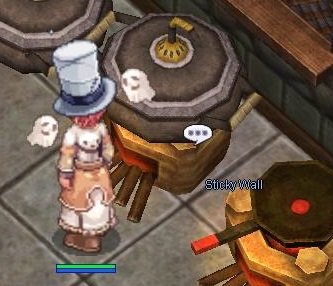
- After cleaning the mold, walk down to the cooking pots and the second sponge will come alive.
- Bring 1 x Orange
 and 1 x Alcohol
  to the Sticky Wall on the top cooking pot.
- Walk in front of the big fireplace to the left of the Maid.
The last sponge requires 1 x Lemon
 and 1 x Fine Sand
  .
.

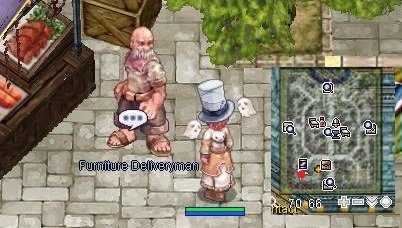
- Talk to the Maid and she'll alludes to the furniture delivery person being the one who took the jewelry box.
- Find Furniture Deliveryman (prontera 68 68) in the southwest corner of Prontera. He becomes worried then defensive that you're suspecting him. After a long hard day moving furniture, he's become hungry and wants 3 x Beef Head
 . After you bring him the items, he will mention that the Guards checked him when he left the castle.
- Return to Jurgen Wigner in the castle and tell him the way people have perceived Katrin.
- Katrin storms off and Isaac and Jurgen decide that she would like 1 x Witherless Rose
 and 10 x Sea Stones
  ( dropped by Medusa beach_dun only if the quest is taken).
- Talk to Jurgen Wigner, receive 10 x Honor Token
5 000 000 Base exp + 2 500 000 Job exp.
3. Geoborg Sidequest:
- Talk to the blonde Bodyguard Jared (prt_cas_q 85 127) at the Geoborg residence.
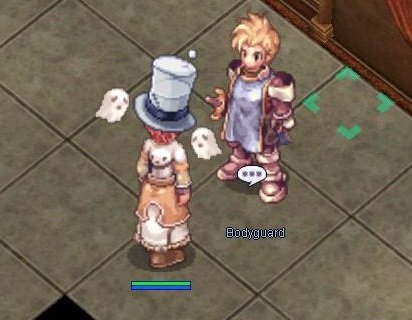
- Speak to Scarlet Jaha (prt_cas 73 244) near a flower setting at the left side of the banquet hall, at the bottom of the stairs.
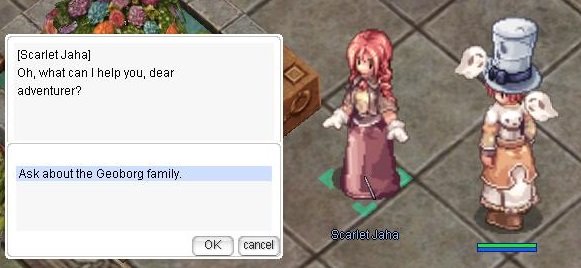
- Then talk to Lidion Geoborg (prt_cas 82 240) at the foot of the stairs to find out how little he actually knows about the family and Prince Ernst stepping down.

- Speak to Scarlet Jaha again and she wants you to find Prince Ernst.
- Walk on the following spots (must be in order):
- prt_cas 77 257
- prt_cas 87 235
- prt_cas 110 240
- prt_cas 108 221
- prt_cas 90 223
- prt_Cas 77 221
- prt_cas 90 229
- Return to Scarlet Jaha, receive 10 x Honor Token
3 500 000 Base exp + 3 500 000 Job exp.
4. Rougenbourg Sidequest: Wolf and Isaac's Dealings
- During the conversation with Wolf Roegenburg, he asked the adventurer for a favor to collect an item from Isaac Wigner on his behalf.

- Isaac Wigner tells you that Wolf must really trust you and gives you Sample of New Project Item to give to Wolf.
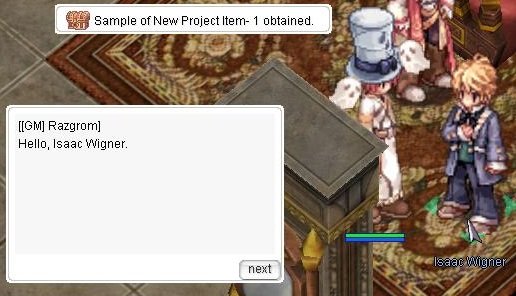
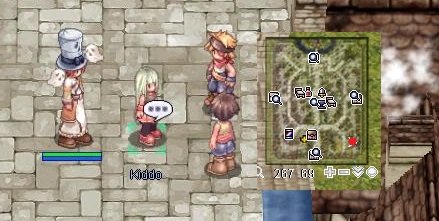
- Give Wolf Roegenburg (prt_cas_q 96 186) the project item, and he tells you that the box is password protected. The password is 1618. Once you unlock the box, you pass along the message about the rumors going around Prontera. You're asked to investigate more by asking young children in Prontera.
- Talk to the 3 Kiddos (prontera 267 69) in South-East of Prontera. They want compensation for telling you the story:
- Travel to the library by walking through the portal in the southeast corner of the Banquet Hall and speak with Uptight Librarian by the stairs. She asks for your library card, but since you are the Adventurer, she will give you the book. She asks questions about the banquet:

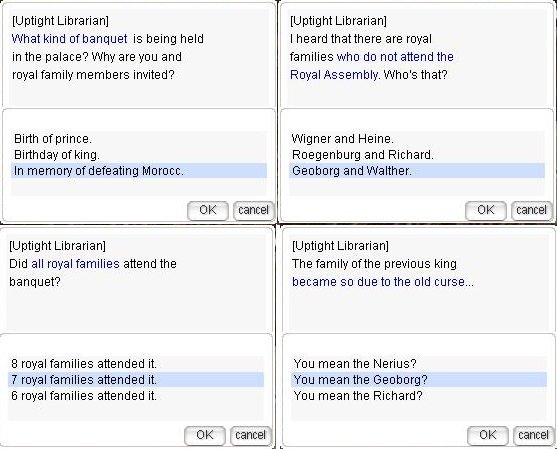
- Return to the Kiddos in southeast Prontera. The rumor is below. The Roegenburg family had a mysterious murdering of four children.
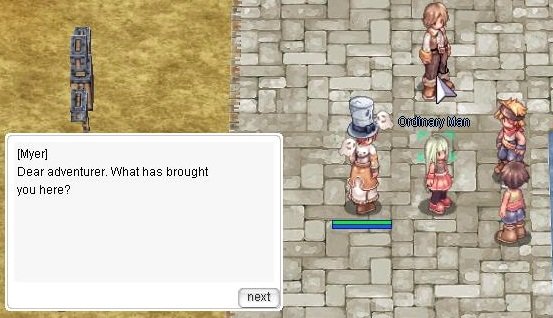
- Returning to Wolf Roegenburg (prt_cas_q 96 186) in the Castle, you tell the family a softer version of the story. Myer Roegenburg admits to having spread the rumor himself, due to everyone having different agendas and viewpoints. It seems the rumor is mostly true.
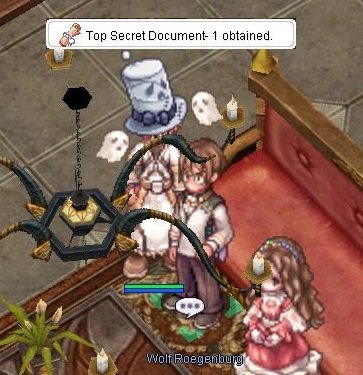
- The family argues amongst themselves, and Wolf Roegenburg then gives you Top Secret Document to give to Isaac Wigner.
- Isaac Wigner (prt_cas_q 94, 7) reads the document aloud; Wolf is going to shift his business away from war. Isaac respects his decision.
- Return to Wolf Roegenburg and he decides to pursue his business. Maximilian will then tell you the true story. The parents of the four children gave birth to Agnes and went to a neighboring country. Monsters attacked them, and they were blocked from bringing soldiers across country lines.
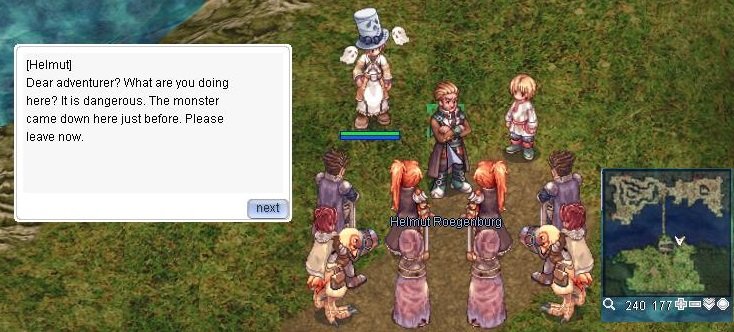
- At the end of the story, Maximilian Roegenburg (prt_cas_q 90 187) wants you to bring back Helmut who is near the border with Schwaltzvalt.
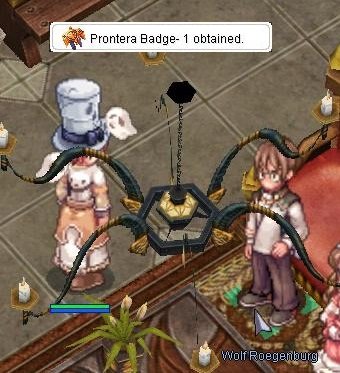
- He gives you Prontera Badge which will instantly transport you to Prontera.
- Find Helmut Roegenburg (yuno_fild01 242 175) and his soldiers one map north of Al De Baran by the water. He has given up the unification war and instead of working on defending the people. Helmut asks you to tell Wolf Roegenburg that he will transfer his heirship to him.
- Return to Maximilian Roegenburg and relay Helmut's message. Wolf then wants you to deliver a message to Myer.
- Ask the Kiddos in Prontera where you can find Myer. He appears and you tell him the message.
- Tell Maximilian Roegenburg that Myer will visit after the banquet, receive 10 x Honor Token
5 000 000 Base exp + 2 500 000 Job exp.
-
Quest Prerequisite(s): Onward to the New World
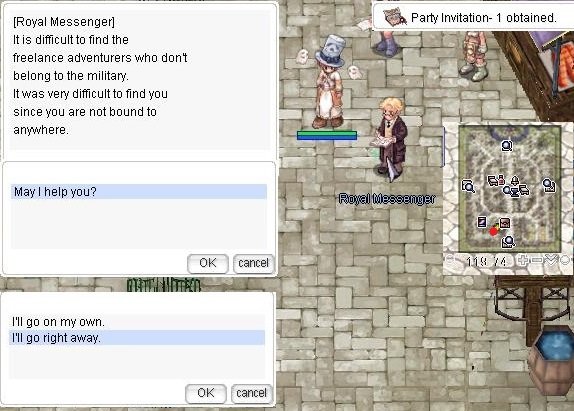
1. Speak with the Royal Messenger (prontera 121 72) in Prontera to start the quest. He will give you a
 Banquet(party) Invitation.
2. Go in the Prontera Castle. Upon entering the castle, Chamberlain Bell will ask to follow him. Walk towards the left wing and enter the portal. Keep going forward to enter your room and Chamberlain Bell will be waiting for you inside.
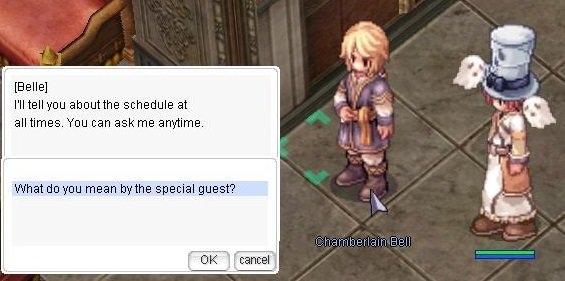
3. Speak with Chamberlain Bell in your room (prt_cas_q 133 8 ), he asks you meet with all the members of the other families. You can always come back to him to know which family you haven't talked to yet.
4. Heines Family: Walk to the room just north of your private room (prt_cas_q 133 32). Talk to Kronecker.
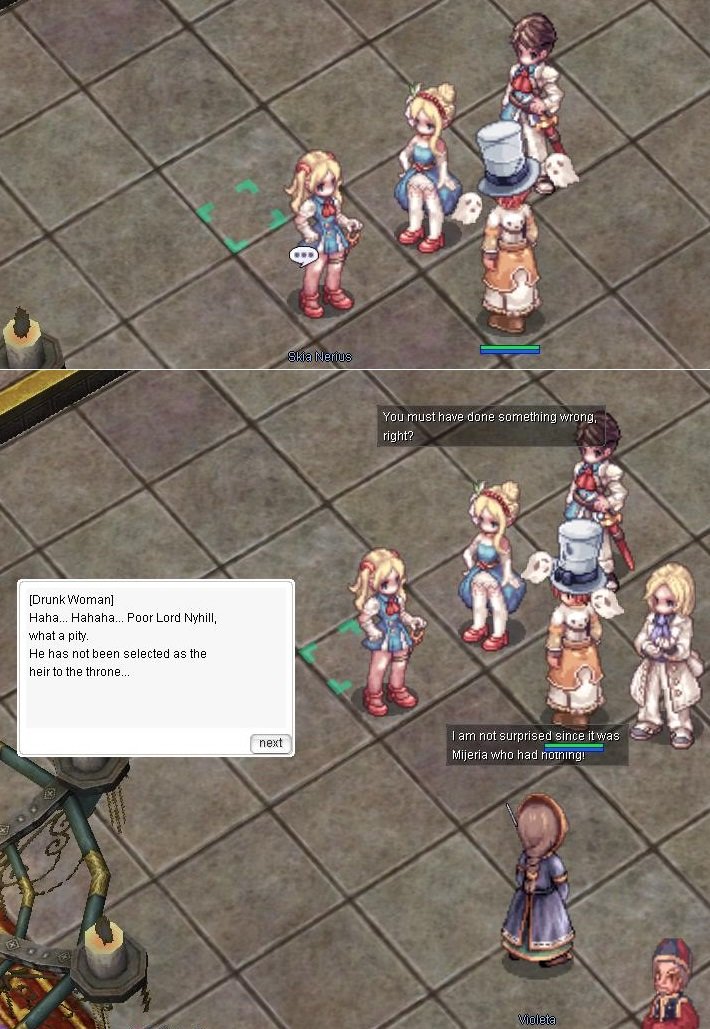
5. Leave the room and walk a bit north. Nyhill and Skia will start a conversation about being the shadow of Peter and the Heine family. (around prt_cas_q 142 37)
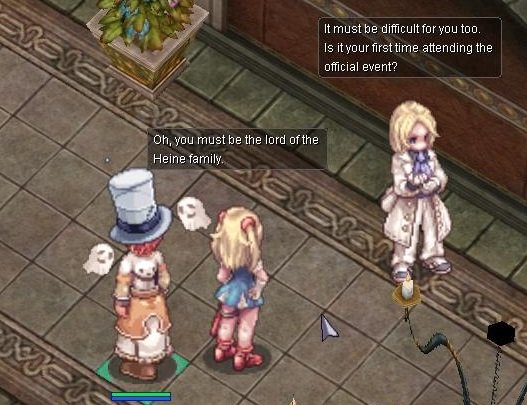
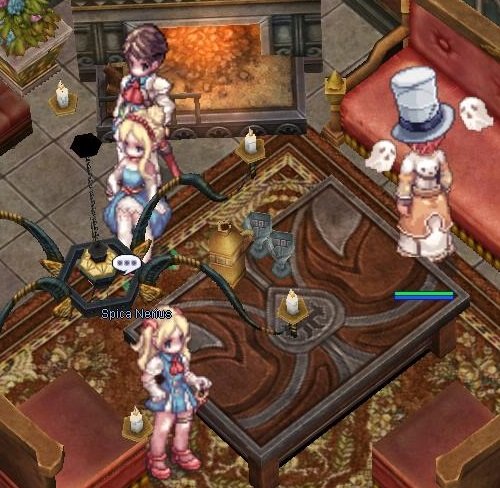
6. Nerius Family: Travel north to the next room (prt_cas_q 133 56) in the west corridor and find Spica Nerius. Led by women, the Nerius family is not interested in the throne. Erich is the candidate and is hanging out in the banquet hall.
7. Walther Family: Walk to the furthest room (prt_cas_q 133 80) in the west corridor and talk to Ian Walther twice and then if you want to get sidequest talk to Isenhonor Walther.
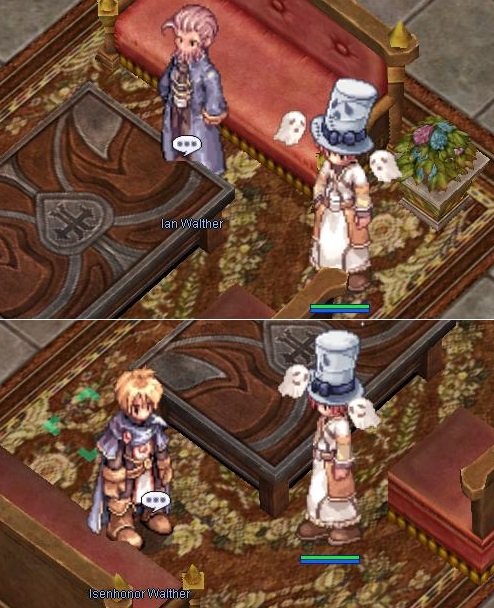
Walther Sidequest: The secret letter is available now.
8. Wigner Family: Walk back to the red carpet at the entrance and go east instead this time (prt_cas_q 150 119).
Talk to Levuiere Wigner and Catherine Wigner.

Talk to Jurgen Wigner.
Wigner Sidequest: The Maid and the Jewelry Box is available now.
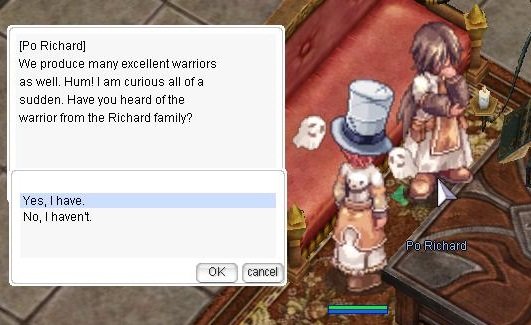
9. Richard Family: Travel to the second room and speak with Butler for the Richards (prt_cas_q 150 143).
Talk to Bulter.

Talk to Po Richard. If you want to do some monster-hunting sidequest choose i'll try. Butler help you with quest.
- there will be a task to kill level 140+ monsters.
10. Geoborg Family: Walk north to the middle room in the east corridor and you'll be stopped by the two bodyguards and the Queen will let you pass (prt_cas_q 150 167).
Talk to Queen.
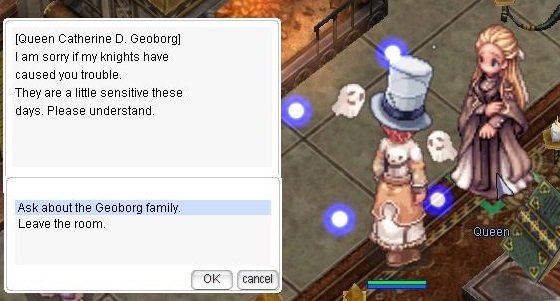
Geoborg Sidequest: Ernest's Secret is available now.
11. Roegenburg Family: Travel to the last room in the east corridor and talk to Maximilian Roegenburg (prt_cas_q 150 191).
Rougenbourg Sidequest: Wolf and Isaac's Dealings is available now.
12. Return to your private room and speak with Chamberlain Bell to receive 10 x Honor Token
,1 500 000 Base Exp + 1 500 000 Job Exp.
13. Proceed to the Banquet Hall at the end of the red carpet. You'll overhear a conversation with two NPCs that pop up outside Nyhill's room (prt_cas 177 163). If the NPC does not appear, go around this point (prt_cas 177 163).You can also go to the banquet room, chat with the Nerius family and get back to point (prt_cas 177 163).
14. Once in the Banquet Hall, walk to the foot of the stairs on the right and speak with Skia Nerius or Spica Nerius (prt_cas 104 240). Complicated royal things are discussed as Violeta appears.

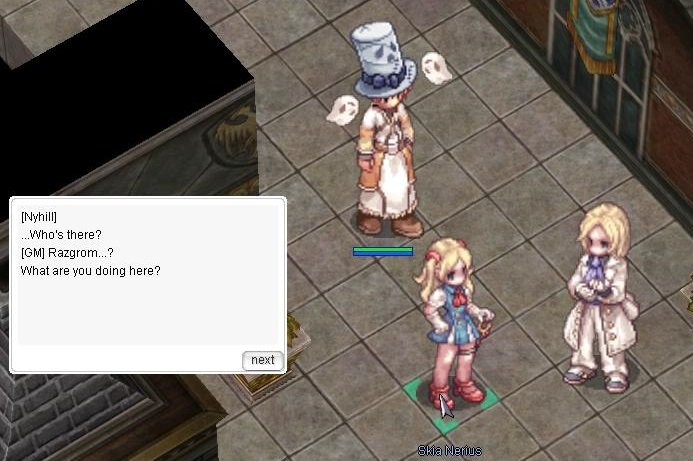
15. Nyhill becomes mysteriously drunk off of very light champagne and returns to his room. Follow him. You'll overhear a conversation with two NPCs that pop up outside Nyhill's room (prt_cas 180 163). If the NPC does not appear, go around this point (prt_cas 180 163).You can also go to the banquet room, chat with the Nerius family and get back to point (prt_cas 180 163).
You hear that they drugged Nyhill

Then Skia Nerius appears and the two disappear.
16. Go inside Nyhill's room and walk around the entrance until Skia and Nyhill appear. Listen to their conversation.
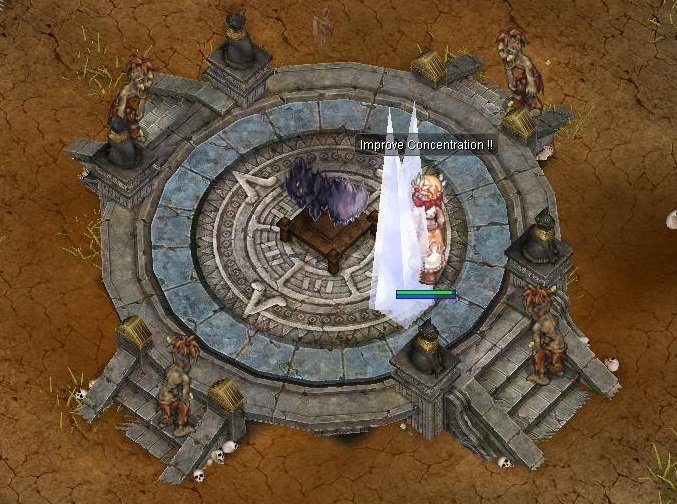
17. Return to your private room and talk with Belle. The Court Mage Nillem will appear and then transport you to the Room of Consciousness.
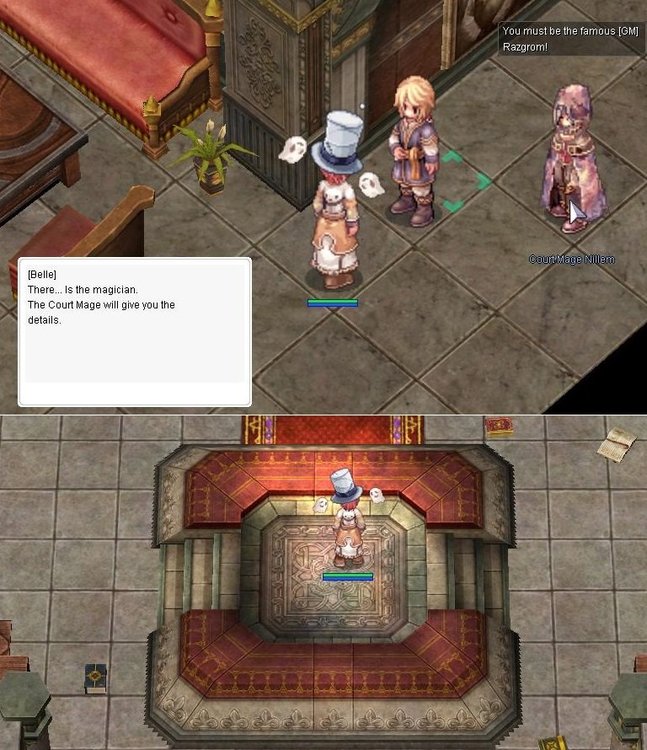
~ Ritual of Blessing Instance
18.Talk to Mage Nillem
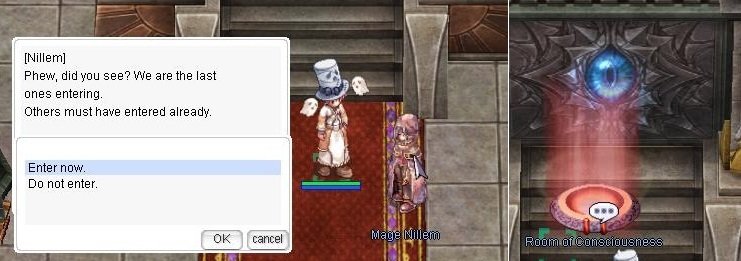
19. Talk to Skia and Nyhill at the spawn point and they tell you to sit next to Po Richard and behind Ernst Geoborg. Walk at (106 77) to initiate the ceremony.
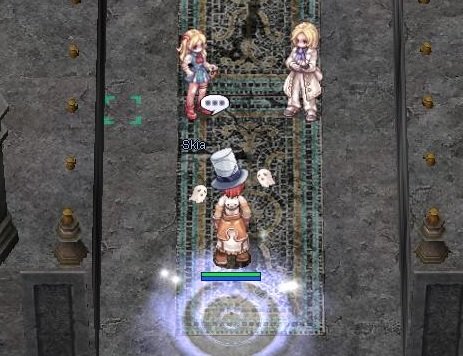
20. An intruder comes in, attacks Peter, and demands the Ymir's Heart. Then spawns 3 very weak monsters.

- Nyhill will heal you for 9999 and give you Kyrie Eleison if you walk near him.

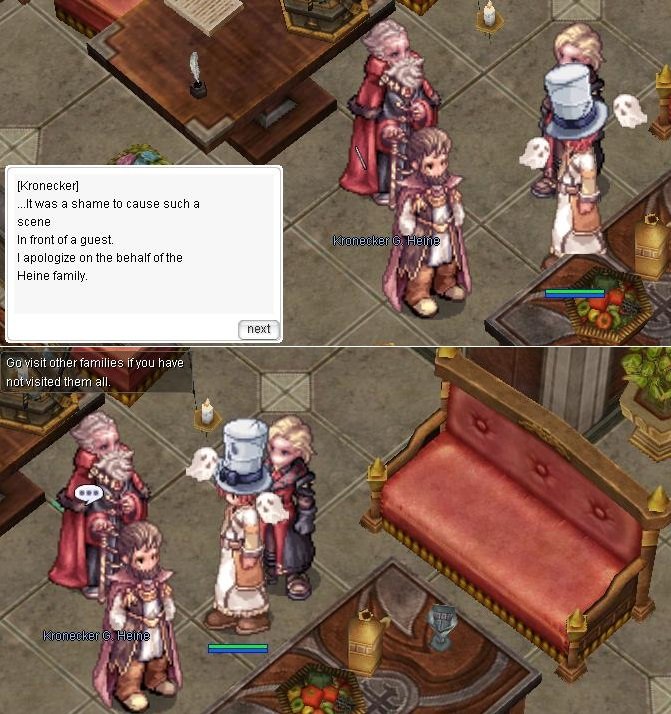
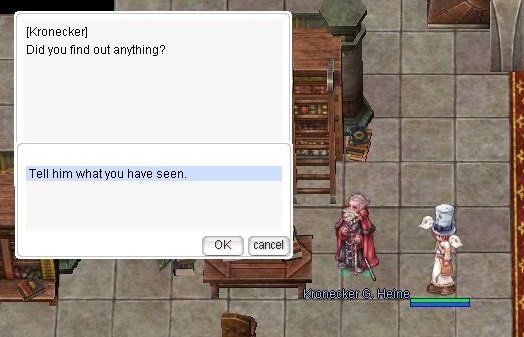
21. Once all are defeated, talk to Kronecker G. Heine at the altar. He'll send all the families away (if you hadn't already talked to them).
~ After the Ritual
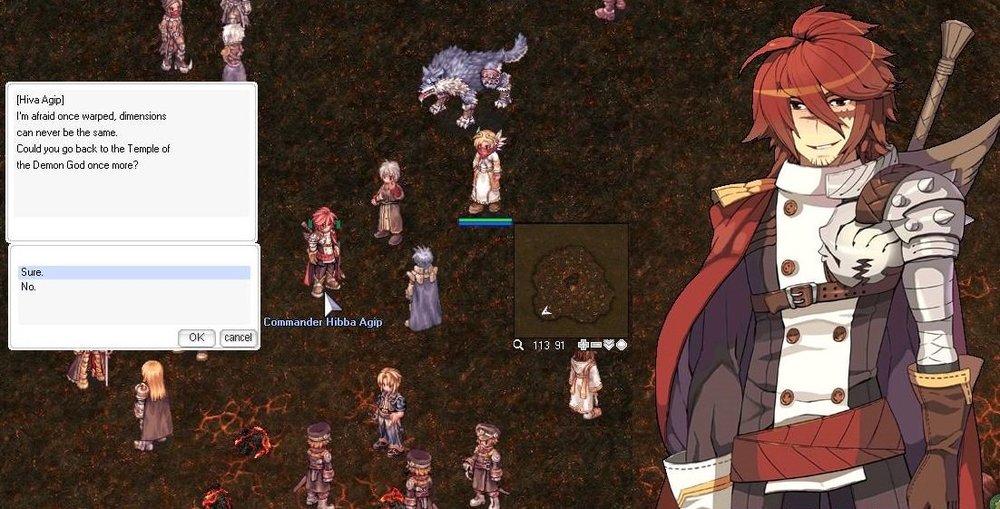
22. Once outside the instance, talk to Ian Walther. They suspect that you are involved. Terra Gloria and the Star of Blessing was stolen. Nyhill eventually confesses to telling someone about the ritual while he was drunk earlier.
23. Talk to Mage Nillem
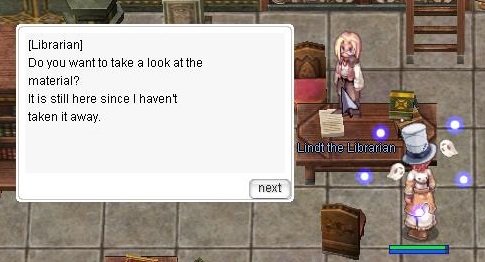
24. Talk to Lindt the Librarian and see that there are magical blank pages in the book.
25. Talk to Mage Nillem again as he discovers some magic like the Dimensional Crack.
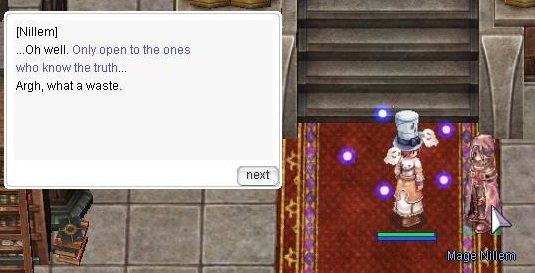
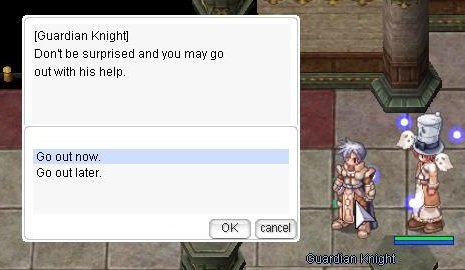
26. You're told to talk to Guardian Knight to leave by Nillem.
27. After being transported to the prison, talk with Overwatcher Terketh to be let out.

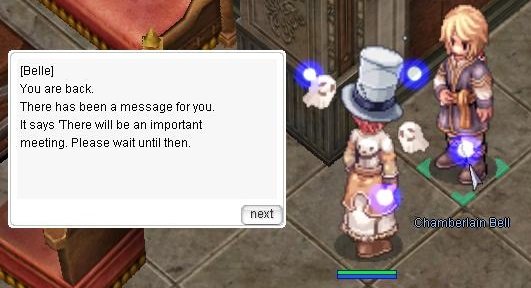
28. Return to your private room and talk to Chamberlain Bell to find a message for you. The Nerius family wanting you to visit.
- i'll visit her now
29. Go north to the third room in the west corridor and talk to Spica Nerius (who is actually Skia in disguise).
- You can only talk to her when she is the only NPC in the room.
- If the other two are in there, you'll have to wait/make them disappear.

30. Enter the room immediately south (the Heine's) and talk to Kronecker G. Heine, receive 20 x Honor Token
, 2 000 000 Base Exp + 2 000 000 Job Exp. Access to Request from Chief Guard repeatable quest.
31. Return to Bell.
32. Talk to Court Mage Nillem. Now he can teleport you to the past.
33. Lets go to the Room of Consciousness
34. After the first pass 'The Room of Consciousness' you will need to talk to the Kronecker G. Heine to complete the history. Receive 30 x Honor Token
, 4 000 000 Base Exp + 4 000 000 Job Exp.
- Lets go to the left side, there will be a warp.
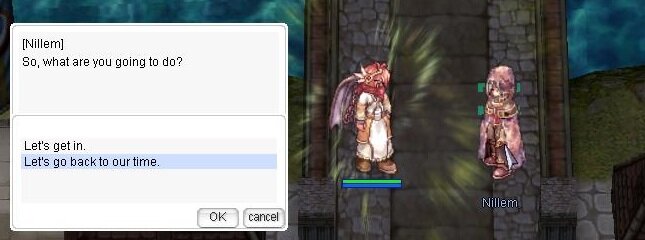
*note - in order to get to the past, you need to take a DQ 'The Room of Consciousness Instance'. It is also better to perform it immediately, so that there are no problems later.
-
1. Talk to MARS_01
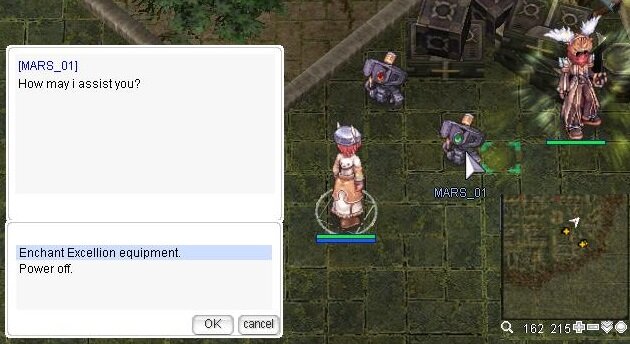
BluePrint 
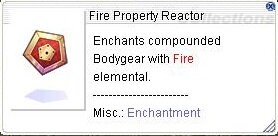
Location Effect Max Count Fire Property Reactor Blueprint Suit 
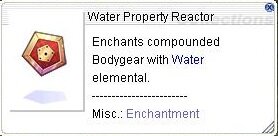
1 Water Property Reactor Blueprint
Suit
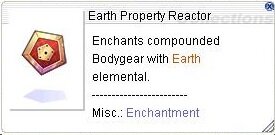
1 Earth Property Reactor Blueprint
Suit
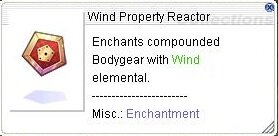
1 Wind Property Reactor Blueprint
Suit
1 Fire Resistance Reactor Blueprint Wing 
3 Water Resistance Reactor Blueprint Wing
3 Earth Resistance Reactor Blueprint Wing

3 Wind Resistance Reactor Blueprint Wing

3 Recovery Reactor Blueprint 101 Suit / Wing

3 Recovery Reactor Blueprint 102 Suit / Wing
3 Recovery Reactor Blueprint 201 Suit / Wing
3 Recovery Reactor Blueprint 202 Suit / Wing

3 Supportive Reactor Blueprint INT Suit
1 Supportive Reactor Blueprint STR Suit
1 Supportive Reactor Blueprint DEF Suit / Wing
3 Supportive Reactor Blueprint Perfect Suit / Wing

1 Supportive Reactor Blueprint Attack Suit / Wing

3 Supportive Reactor Blueprint Magic Suit / Wing
3 Supportive Reactor Blueprint Frozen Suit
1 Supportive Reactor Blueprint MaxHP Suit / Wing

3 Supportive Reactor Blueprint MaxSP Suit / Wing

3 Supportive Reactor ASPD Suit / Wing
1 FE:
-
1. Talk to Ingrata A.

1. Upgrade Part - Plate
 / Supplement Part - STR
- 3 999 999 zeny for armor
1.1. Upgrade Pile Bunker :
Pile Bunker
 + 300 Dented Iron Plate
  + 15 Broken Engine
-
S[1]

-
P

-
T[1]

2. Talk to Ingrata M.

- Exchange 10 x Charleston Components
 for others items. ( 10 = 1 )
Reinforced parts:
-
Upgrade Part - Engine [1]

-
Upgrade Part - Booster [1]

-
Upgrade Part - Gun Barrel [1]

Supplementary device:
-
Supplement Part Con/Vit [1]

-
Supplement Part Agi [1]

-
Supplement Part Dex [1]

3. Excellion Set
Unlike other Verus equipment, these can be used by every job and have a level requirement of 99 to equip. They are highly customizable by using reactor blueprints to enchant each piece.
PLUTO_0 will speak only if there is a resource in the inventory 1 x
 or 1 x
PLUTO_09 will make Excellion gears and produce blueprints
 (enchants). For 10 x Large Iron Scraps and 5 x Old Fuel Tanks , will give one of Excellion Suit
  or Excellion Wing
  at random.
For 5 x Old Fuel Tanks
will give you one random blueprints .
4. Craft Pile Bunker
Talk to Gomer on Yuno ( /navi yuno 179/174 )
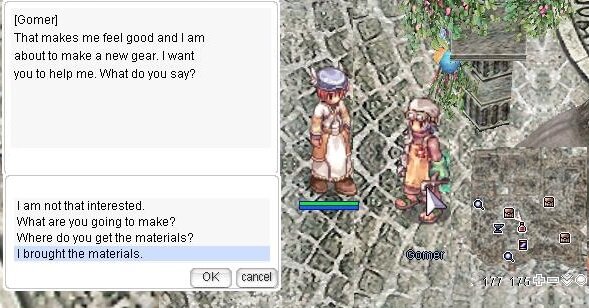
1 Brocca
 + 250 Steel
  + 30 Flexible Tube
  = Pile Bunker
5. Talk to Ingrata Ar.

You can improve your armor and get a slot in the armor. You will need one of the armors:
Upgrade Part - Plate
+9 / Supplement Part - STR +9 without enchant + 50 x Charleston Components ( this number has been lowered in contrast to the official value associated with the number of players ).
-
 1
1
-
*Additional quest. You can take it one step 4.
After killing a step, you will receive a reward 1 x Charleston Components
 + 5 000 000 Bexp + 1 500 000Jexp
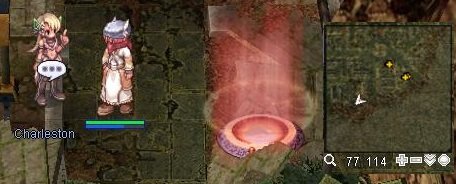
1. Talk to the Charleston ( /navi verus04 75/114 ) there to reserve the instance, then click on the teleport machine to enter the instance.
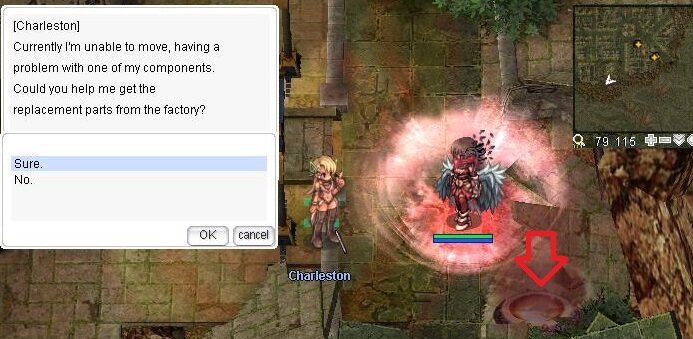
2. After the introduction, move west and kill a monsters to open portal advancing to next area.
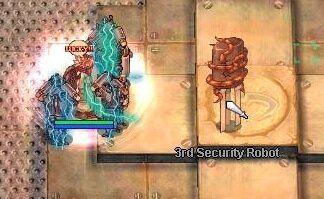
3. After killing the Security Robots, make your way to the lab which is slightly north of the center of the map.
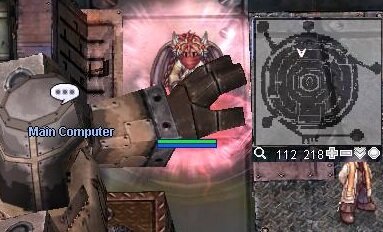
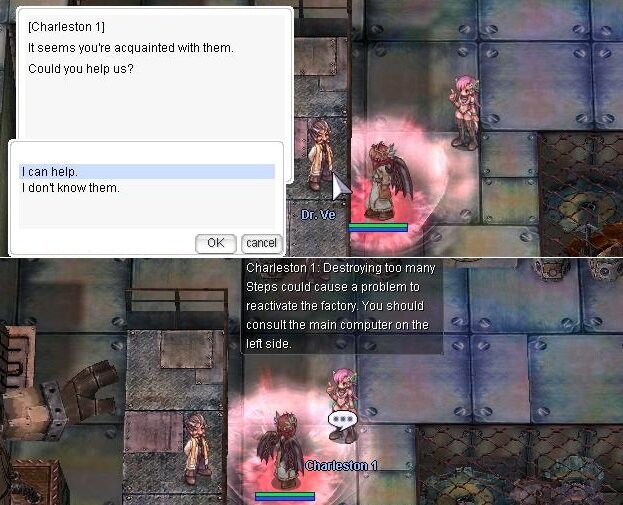
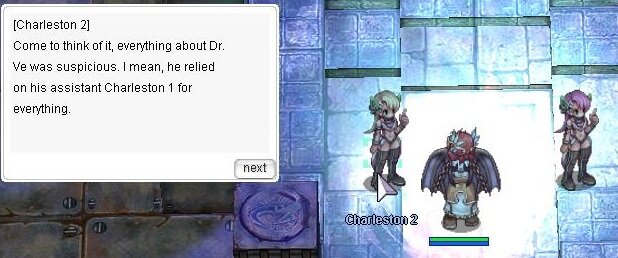
4. Speak to Dr. Ve and Charleston 1 there ( walk around the NPC if there is no dialogue )
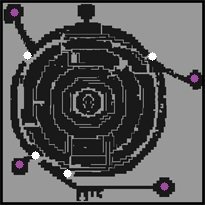
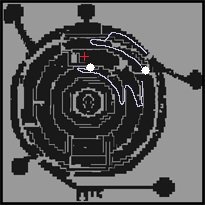
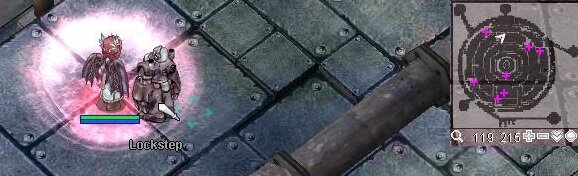
5. You need to kill 3 x LockSteps scattered on 7 spots on the map.
6. After killing return to Charleston 1. Now, she instructs you to check 3 generators scattered on 3 spots on the map. You need to walk near the generator to trigger the dialogue.
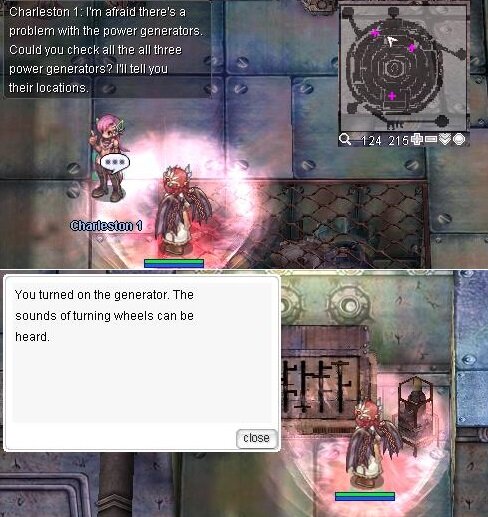
7. Once all generator are checked, return to Charleston 1. Multiple waves of monsters will swarm the area which you need to dispose. Then talk to Charleston 2.
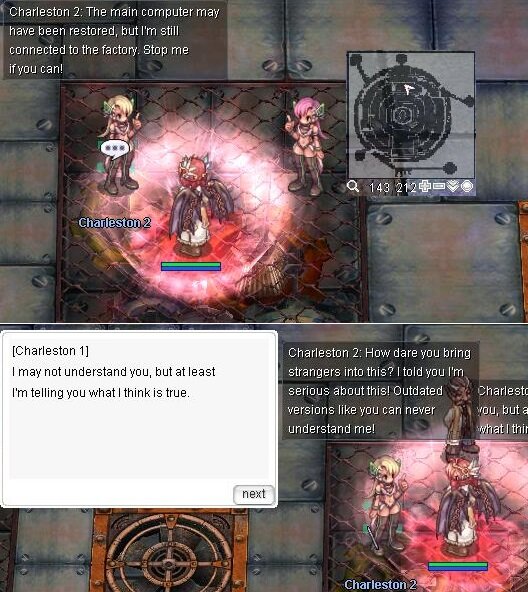
After killing waves talk to Charleston 2.
8. Make your way to center of the map. Move near Charleston 1 to trigger the dialogue. After the dialogue, give 1 x Explosive Powder
 (dropped by monsters) to Charleston 1 to open the central area.
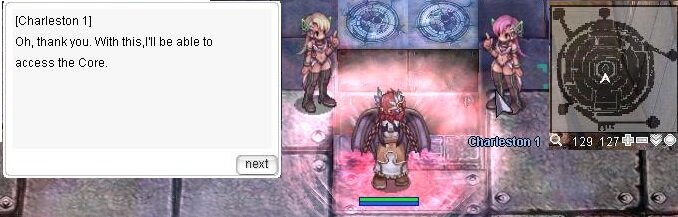
9.Then talk to Charleston 1.
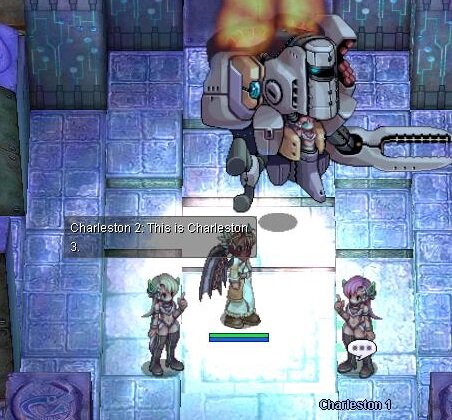
10. When you kill the Charleston 3 , talk to Charleston 2, witness the battle prologue and move out of the area.
11. Return to Charleston 2 and Dr. Ve. talk to both.
12. Talk to Shalosh, you will be given 3 x Charleston Components
and transported to Verus city.

13. Talk to Charleston in verus again, receive 7 500 000 Base exp + 2 500 000 Job exp.
-
Quest Prerequisite(s): The Memory Records
Quest ?Reward?(?s): 3 x MVP
1. Talk to the Civilization Expert
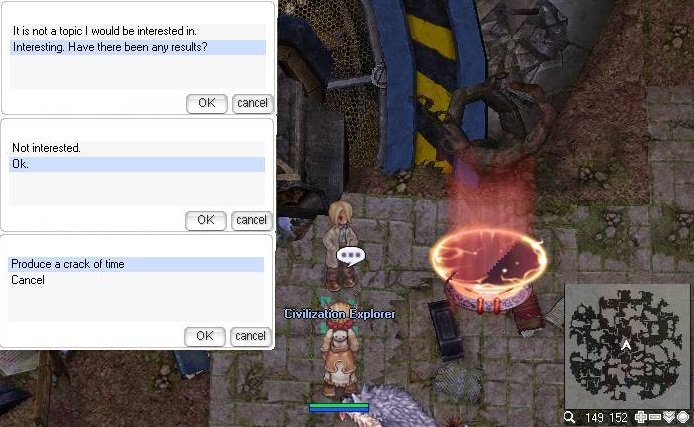
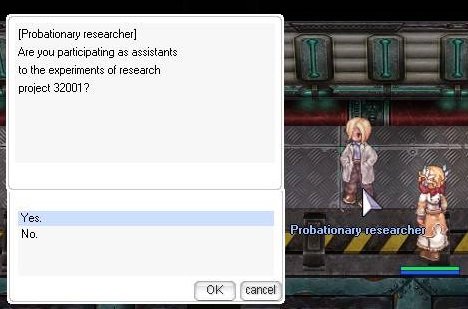
2.Talk to Probationary researcher at the entrance.
3. Walk ahead up until you meet the Senior researcher, he'll give you today's access code.

- The code needs to be entered as a binary number. Use calculator or internet.
- Use the switches behind the researcher to enter the access code given. ON = 1 OFF = 0.
-

- After the code has been properly entered, click the Main Switch at the far left and a warp will open up.
-
4. Walk inside the research area and take the first turn to the right. Inside the laboratory, you'll meet 4 Professors. Get close, and listen to their conversation about the first experiment.
5. Once the MVP is defeated, all of the researchers will get transmitted to another dimension and a portal will open on the far right to leave the area.
-
Quest Prerequisite(s): All quests
Quest ?Reward?(?s): Complete Machine Part
 + Gravity Safety Device
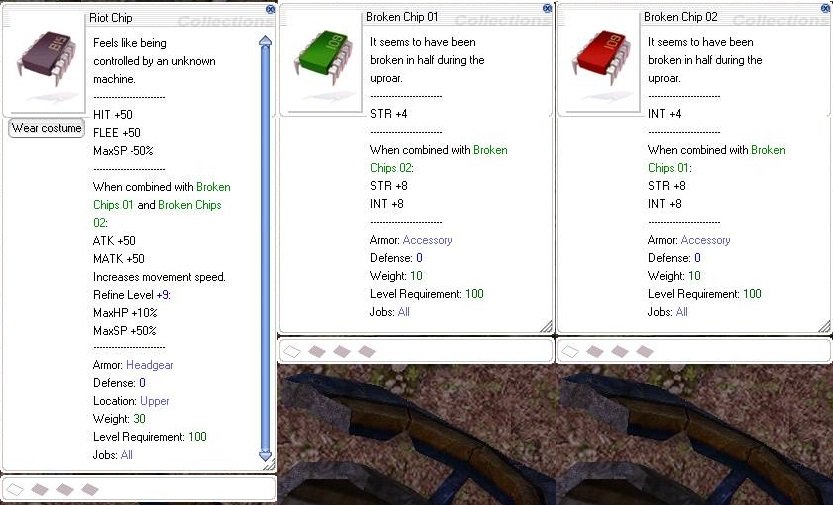
  . Riot Chip [1] , Broken Chip 01 [1] or Broken Chip 02 [1].
- You cannot re-enter this instance if you happen to exit this instance before the instance is completed (e.g. disconnected, died then respawn).
- It is suggested to bring Token of Siegfried in case you die on the middle of the instance.
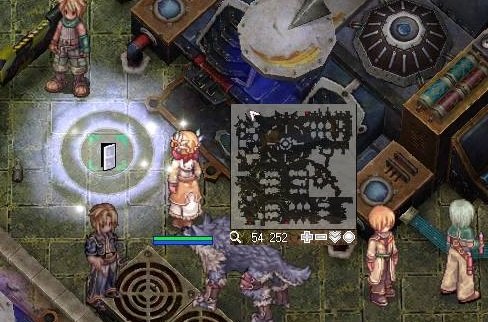
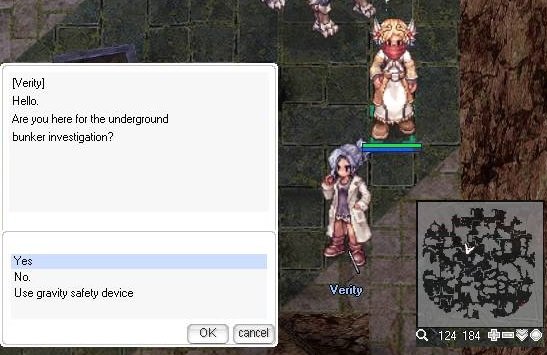
1. To start this instance, go to Verity (verus01 123 181) on Laboratory-OPTATIO. Talk to her to open the instance. Use Gravity Safety Device
2. Once you're on the pathway, talk to Verity.
3. As you head north, a security system triggers and monsters will spawn. Kill all these monsters ( GC109 , DR815 )and then destroy the System Message in the south-west corner of the map.

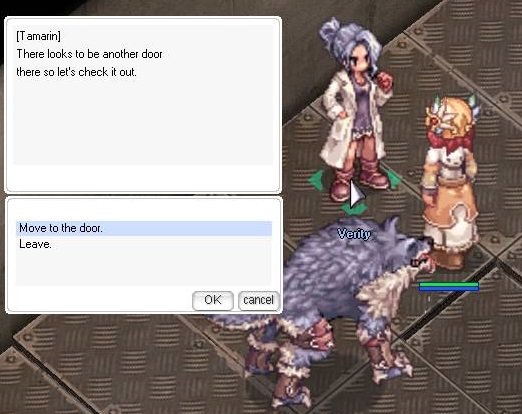
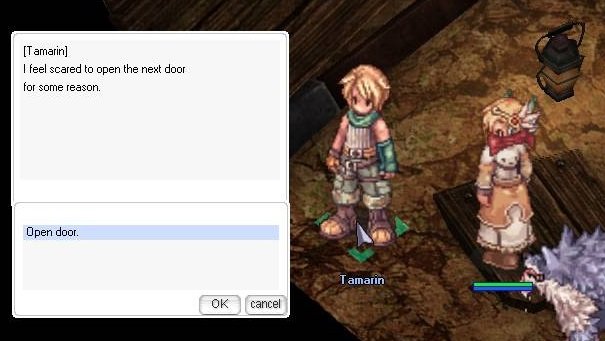
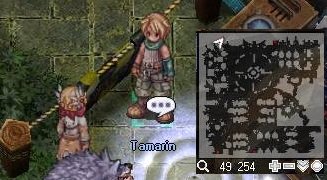
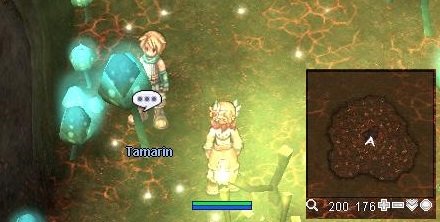
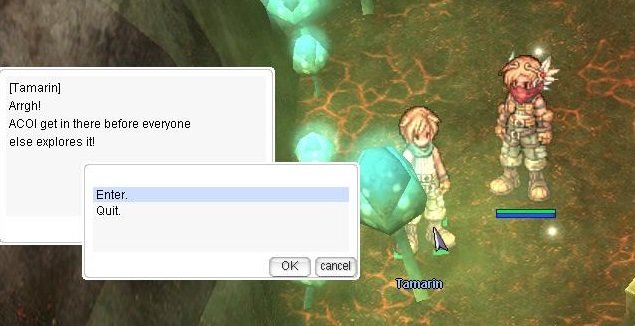
4. Go north again and speak to Tamarin.
5. Keep going north and enter the warp. Take note that a new security system will trigger.
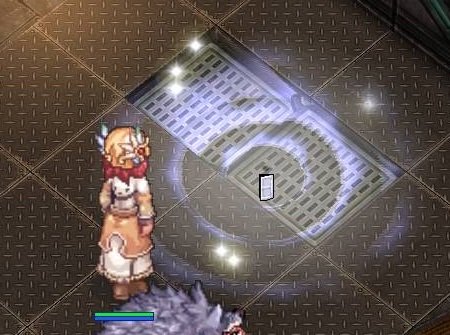
6. Walk ahead until you meet another batch of monsters and Verity at the end of the hallway. Talk to her and enter the door.
7. Inside the room, talk to Verity again. As the final protocol begins, T_W_O and System Messages will spawn and attack you. System Messages will spawn as the time goes and start healing her.
8. After she's defeated, talk to her and you will get warped out of the instance.

9. Speak to Fruit (verus01 151 173) to get Complete Machine Part
+ Gravity Safety Device ( use only if you want to pass the dungeon).
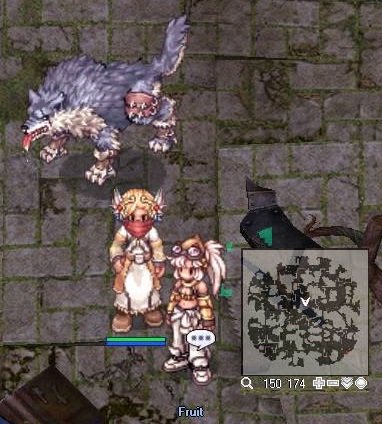
Fruit can will exchange 17 x Complete Machine Part
to Riot Chip [1] , Broken Chip 01 [1] or Broken Chip 02 [1].
-
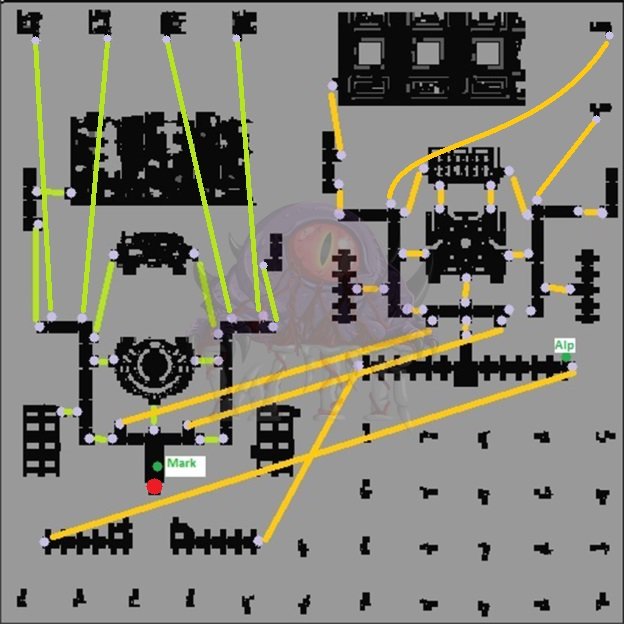
1. Talk to Due
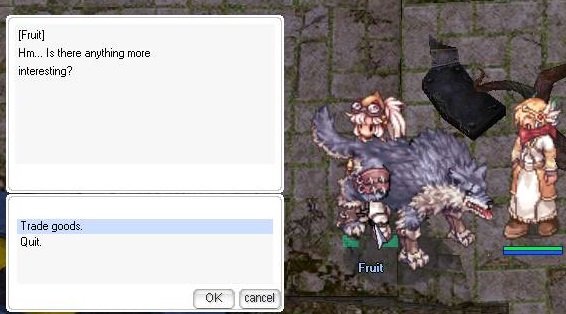
2. Talk to Fruit.
3. Talk to Verity.
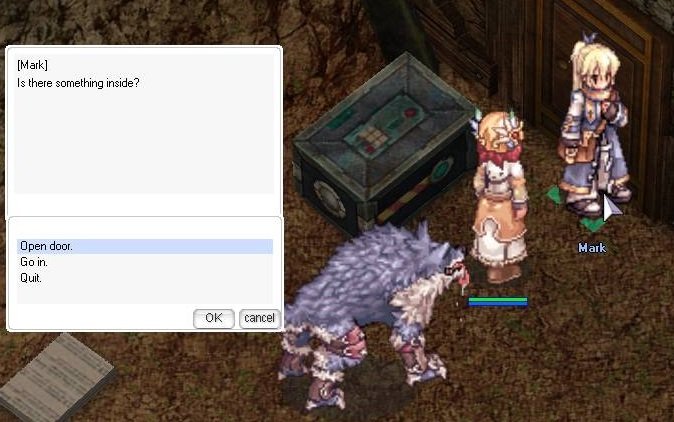
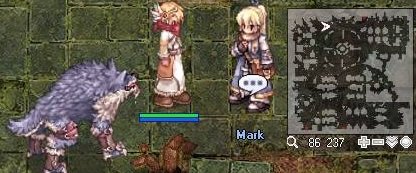
4. Inside the Underground Bunker, talk to Mark.
5. Talk to Alp. You will be warped, talk again.
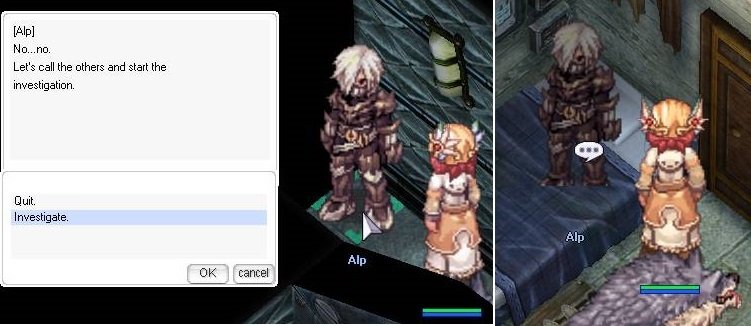
6. You will be warped, talk to Verity. Then talk again.
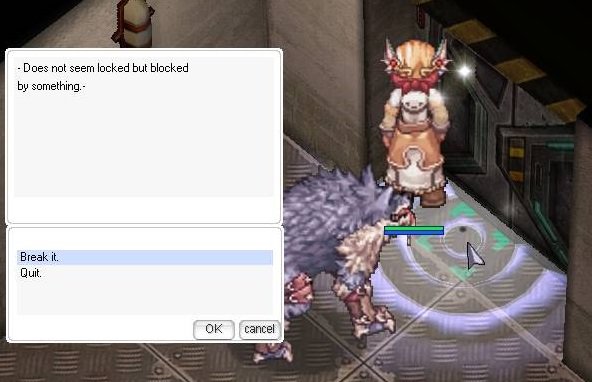
7. Then move forward to break the door.
8. Talk to Due.
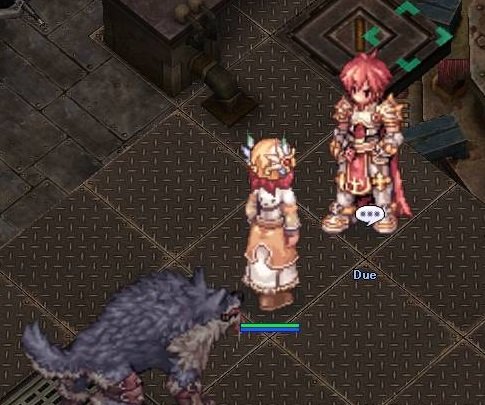
9. After that, enter the warp to the next room. Keep following the warps, until you reach Weird Piece.
10. Talk to Weird piece. You will be warped.
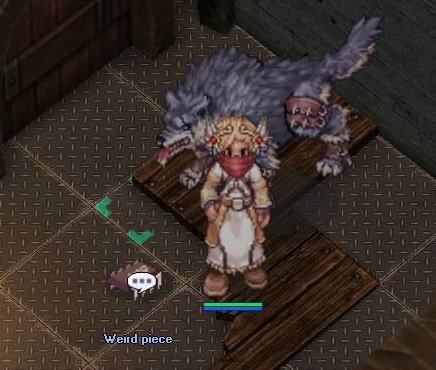
11. Keep existing warps...then talk to Weird piece if you meet it again and just keep going... Go further till you find Tamarin.
12. Talk to Tamarin. Receive Complete Machine Part
+ Gravity Safety Device + 5 000 000 Job exp.
13. You will be warped. Talk to Mark. Generated the Last Room Instance.
14. You will be able to access the Last Room Instance.
-
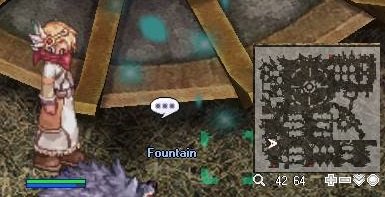
1. Talk to Alf.
2. Investigate the Fountain.

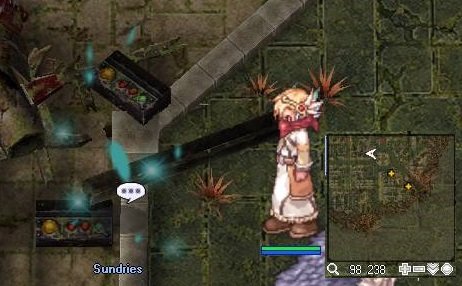
3. Investigate the Sundries.
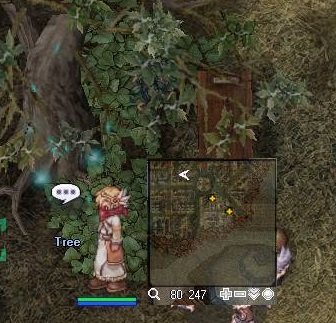
4. Investigate the Tree.
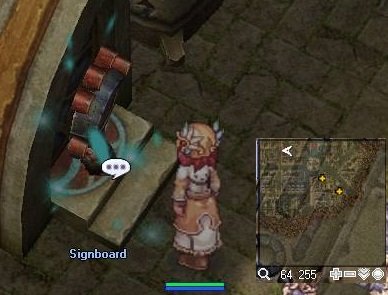
5. Investigate the Signboard.
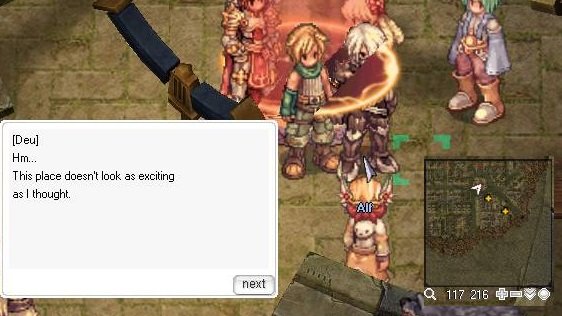
6. Move north of Verus, to the Central Plaza, and speak with Deu.

7. Investigate the Fountain.
8. Find Mark, and speak to him.
9. Then find and speak with Tamarin.
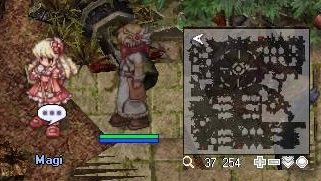
10. Lastly speak with Magi. Receive 5 000 000 Base exp
-
Quest Prerequisite(s): Main quests
1. Passage Cleaning
Quest ?Reward?(?s): 7 500 000 Base Exp + 5 000 000 Job Exp.
1.1. Speak to Commander Louis in (verus04 179 165) to receive a quest to kill 10 x Recon Robots.
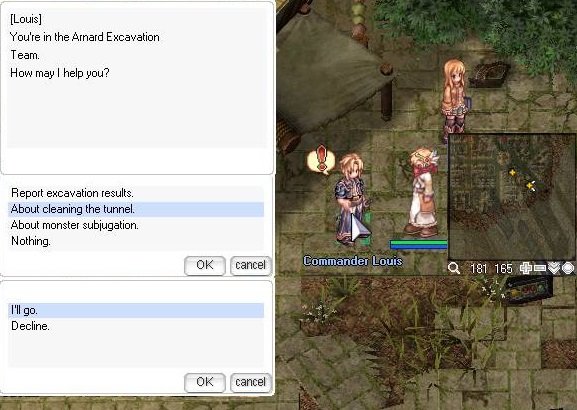
1.2 After killing report to Commander Louis and select 'About cleaning the tunnel'
2. Eliminating Risks
Quest ?Reward?(?s): 7 500 000 Base Exp + 5 000 000 Job Exp.
2.1 Speak to Commander Louis in (verus04 179 165) to receive a quest to kill 15 x Explorer Robot / 15 x Repair Robot
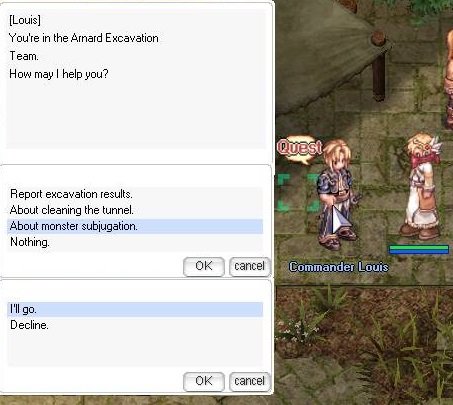
2.2 After killing report to Commander Louis and select 'About monster subjugation'
3. New Power Source
Quest ?Reward?(?s): 7 500 000 Base Exp + 5 000 000 Job Exp.
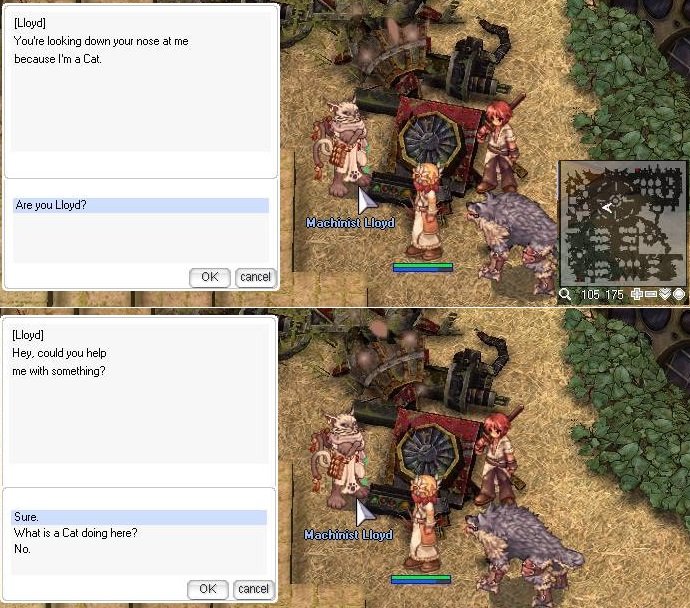
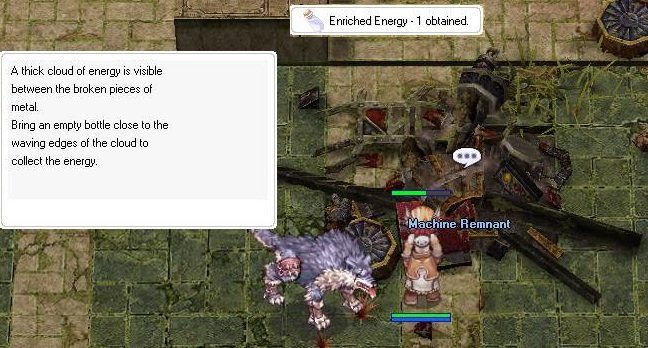
3.1 Speak to Machinist Lloyd in Verus Center Square (verus03 103 177). He asks you to collect 10 x Enriched Energy from the nearby Machine Remnants. Use 10 x Empty bottle.
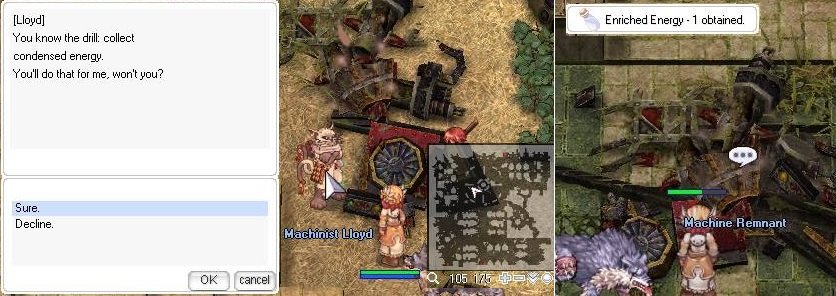
3.2 After collecting report Machinist Lloyd.
4. Core Collection
Quest ?Reward?(?s): 7 500 000 Base Exp + 5 000 000 Job Exp.
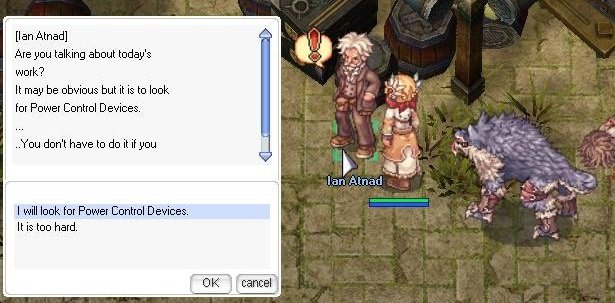
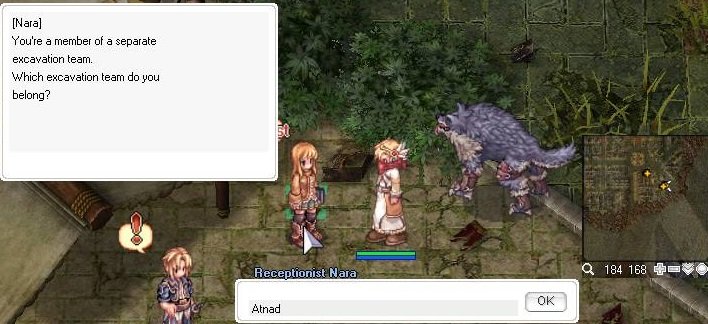
4.1 Speak to Ian Atnad in (verus04 144 193).
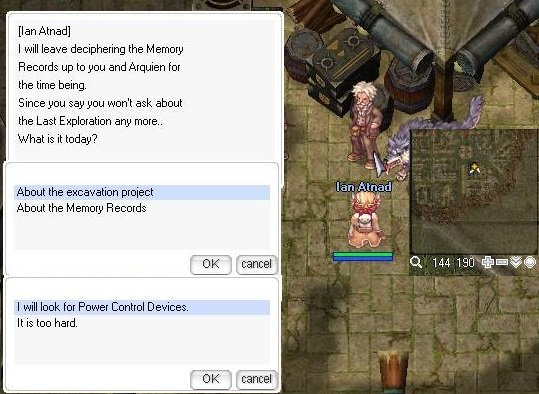
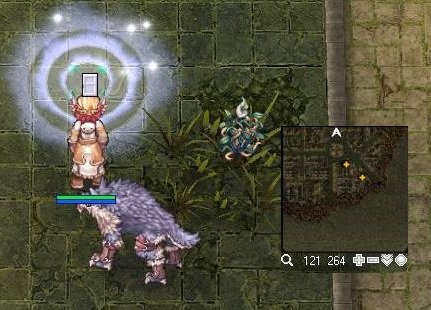
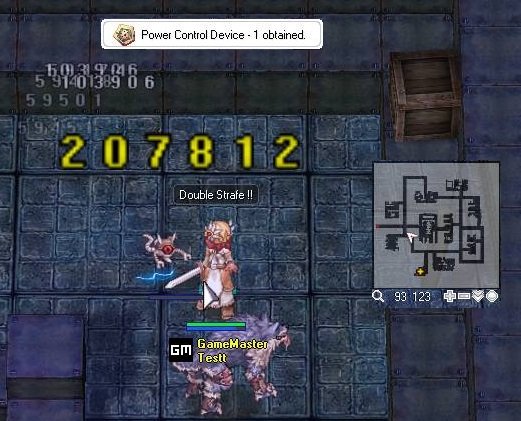
4.2 Collect 20 x Power Control Devices
 by killing the robot monsters in the maps nearby.
4.3 After collecting report to Ian Atnad
5. Collect Memory Records of Research Facilities
Quest ?Reward?(?s): 7 500 000 Base Exp + 5 000 000 Job Exp.
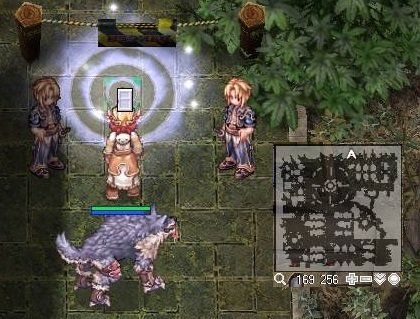
5.1 Speak to Commander Arquien (verus04 172 149) and select 'Research facilities Memory Records'. She asks you to collect 5 Memory Records from the map north east of Verus Center Square.
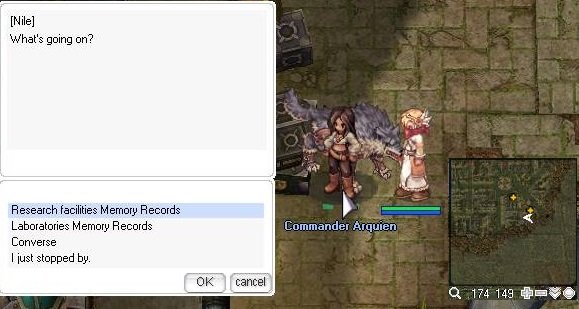
5.2 Collect 5 x Memory Records
 from the Strewn Paper around the map Research Building-WISH .
5.3 After collecting, report to Commander Arquien again and she will tell you to listen to the Record player beside her. Receive Exp.

6. Collect Memory Records of Laboratories
Quest ?Reward?(?s): 7 500 000 Base Exp + 5 000 000 Job Exp + Record Fragment

6.1 Speak to Commander Arquien (verus04 172, 149). She asks you to collect 5 x Laboratory Memory Records
from the Undergorund bunker.
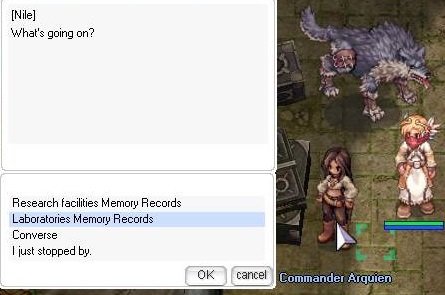
6.2 Talk to Verity (verus01 128 180) 'Yes'. Collect 5 x Laboratory Memory Records
from the Under desk inside the bunker.

6.3 After collecting, report to Commander Arquien again and she will tell you to listen to the Record player beside her.
7. Krotzel's Request
Quest ?Reward?(?s): 7 500 000 Base Exp + 5 000 000 Job Exp
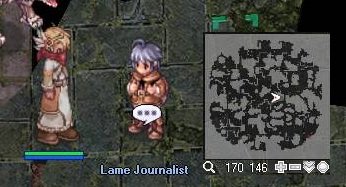
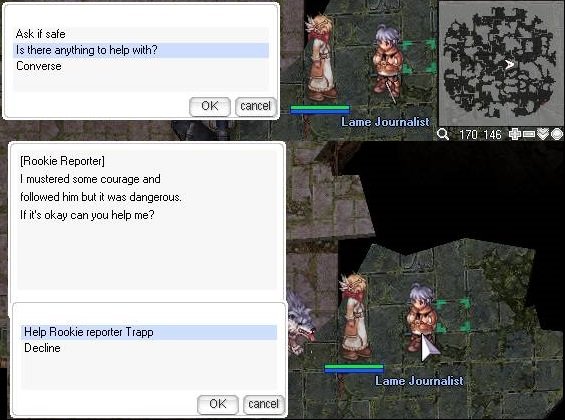
7.1 Speak twice to Krotzel at Research Building-WISH (verus02 79 31). She'll ask you to find Lame Journalist.
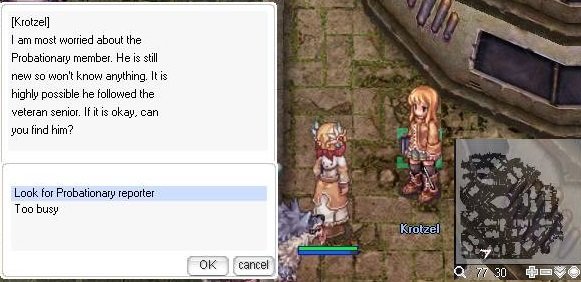
7.2 Speak twice to Lame Journalist at Laboratory-OPTATIO (verus01 172 146). He'll ask you to tell Krotzel he is safe.
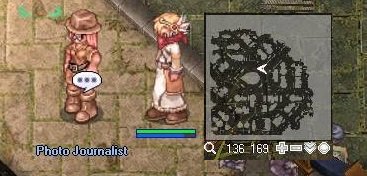
7.3 Speak twice to Photo Journalist at Research Building-WISH (verus02 134 169) and she'll direct you back to Krotzel.
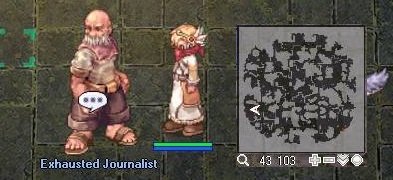
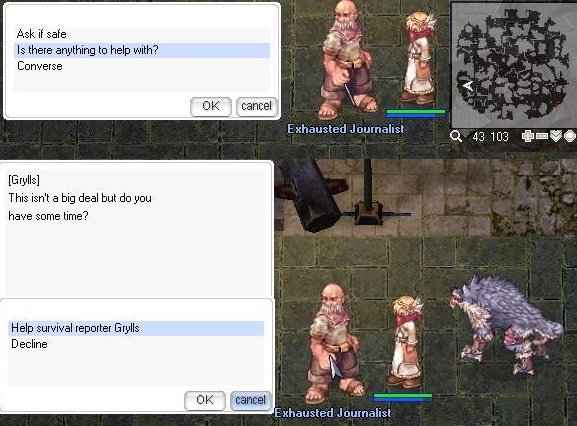
7.4 Speak twice to Exhausted Journalist at Laboratory-OPTATIO (verus01 41 103) and he'll send you back to Krotzel.
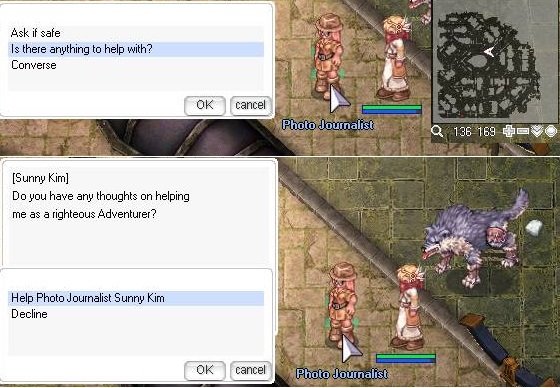
8. Photo Journalist's Request
Quest ?Reward?(?s): 5 000 000 Base exp + 2 500 000 Job exp
8.1 Speak to Photo Journalist at Research Building-WISH (verus02 134 169).
8.2 Kill 30 x Repair Robot Turbo.
8.3 After killing report to Photo Journalist.
9. Rookie's Request
Quest ?Reward?(?s): 5 000 000 Base exp + 2 500 000 Job exp
9.1 Speak to Lame Journalist at Laboratory-OPTATIO (verus01 172 146).
9.2 Kill 30 x Green Cenere
9.3 After killing report to Lame Journalist.
10. Grylls's Request
Quest ?Reward?(?s): 5 000 000 Base exp + 2 500 000 Job exp
Player must completed Krotzel's Request to start this quest
10.1 Speak to Exhausted Journalist at Laboratory-OPTATIO (verus01 41 103)
10.2 Collect 30 x Iron Worm
10.3 After collecting report to Exhausted Journalist
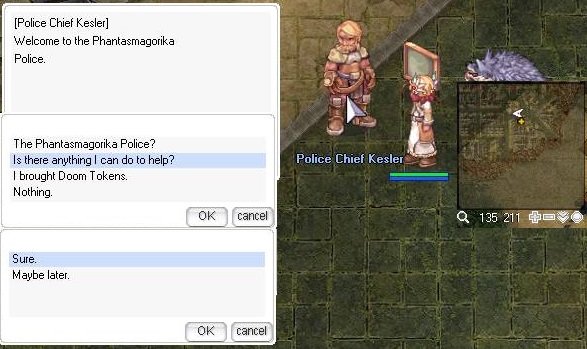
11. Police Chief's Request
Quest ?Reward?(?s): 5 000 000 Base Exp
11.1 Talk Police Chief Kesler
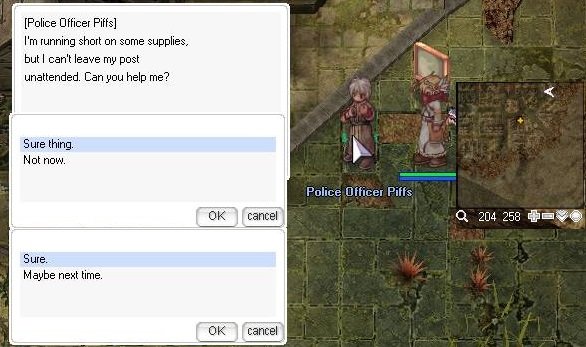
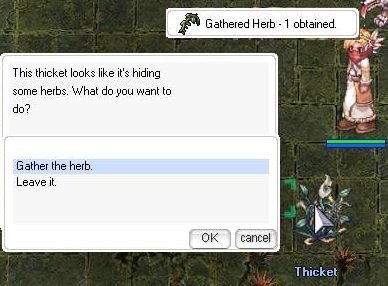
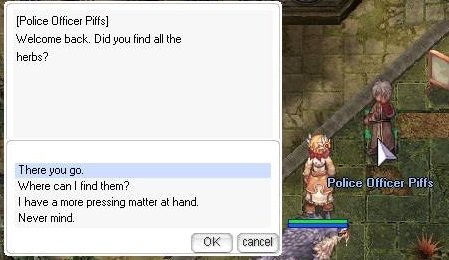
11.2 Find Police Officer Piffs in northeast and accept his request. Collect 10 x Gathered Herbs
 from the Thickets scattered across the map and return to him to complete his request.
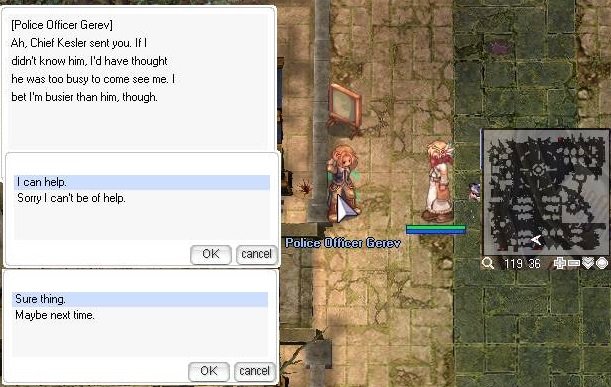
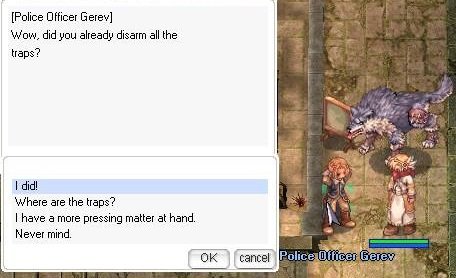
11.3 Find Police Officer Gerev in Verus Center Square and accept his request. Disarm 10 x Doom Prayer Traps and return to him to complete his request.
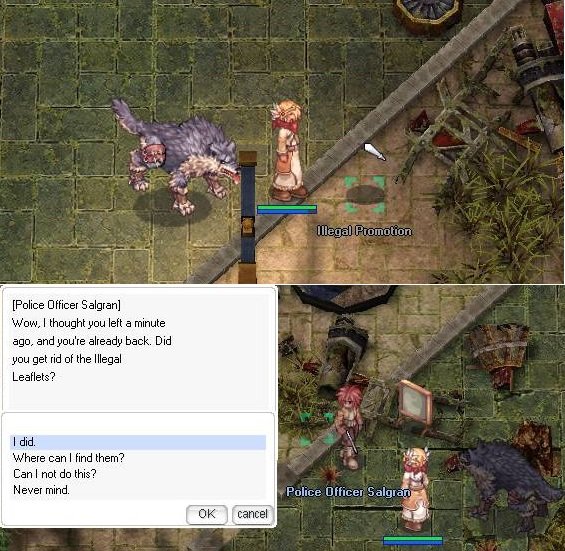
11.4 Find Police Officer Salgran in Verus Center Square and accept his request. Kill 10 x Illegal Promotions and return to him to complete his request.
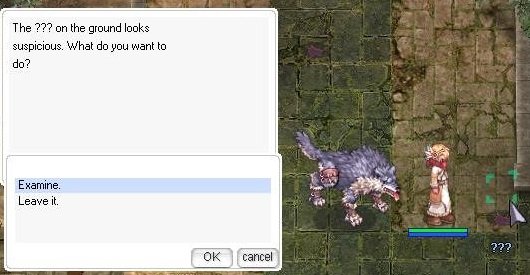
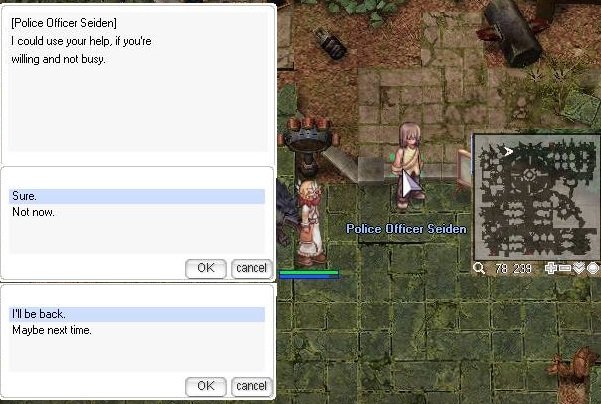
11.5 Find Police Officer Seiden in Verus Center Square and accept his request. Obtain 10 x Stones
 from the same spots as the traps and return to him to complete his request.
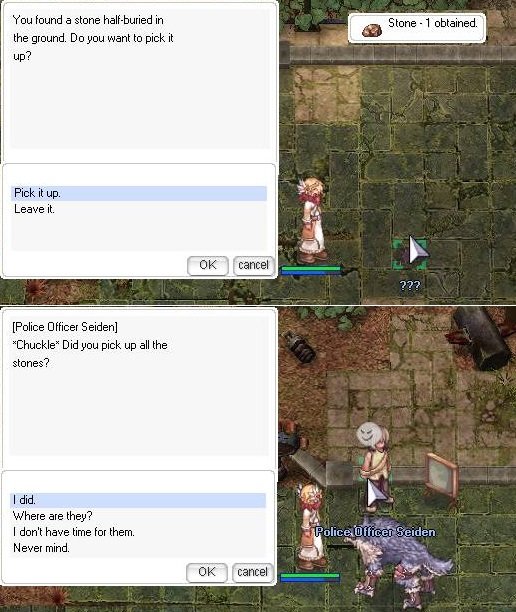
11.6 Return to Police Chief Kesler
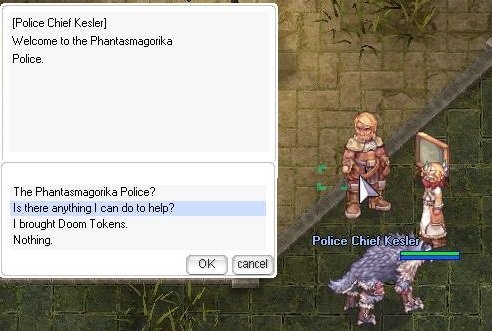
- Note: Police Chief Kesler can change your Doom Tokens
 into Packing Envelope
  . Dropped by Ruin Grace Believer.

12. Fragments Record Pieces
Use the Record Fragment
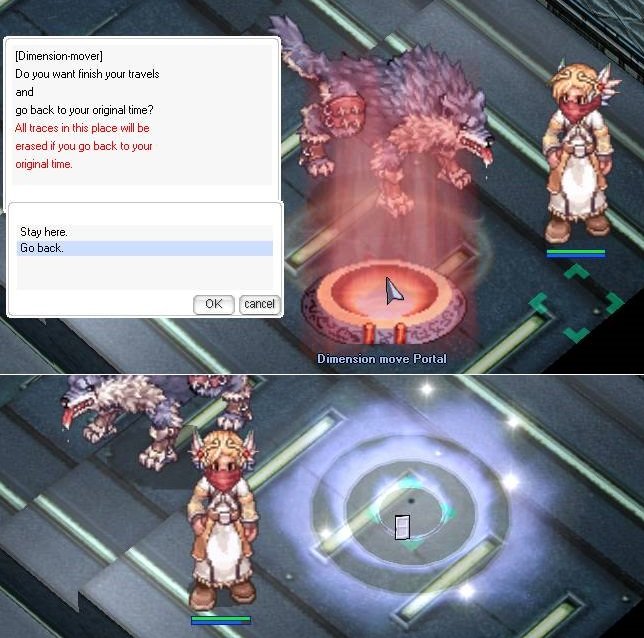
obtained from Collect Memory Records of Laboratories. Player will be warped to the past, in the Monitoring Room of the Under Bunker. There are 5 possible encounter. Only 1 quest can be completed for 1 fragment... ?fter completing the quest leave the bunker with Portal, and leave this place to reset the quests !!!
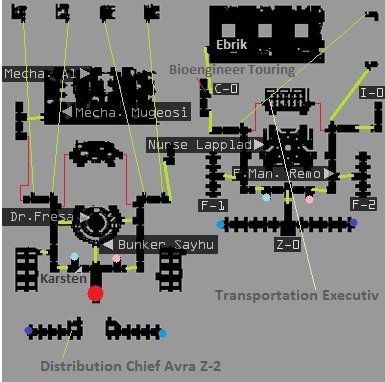
12.1 Grape Harvest
- If you spawn in the garden, talk to Bioengineer Ebrik in front of you and he will ask you to harvest 30 x Grapes
 from the trees around. Grape Vines dropped Grapes every minute.
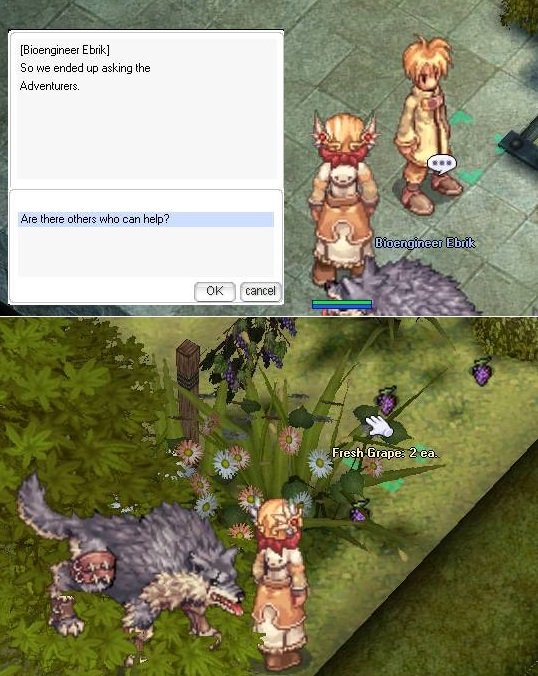
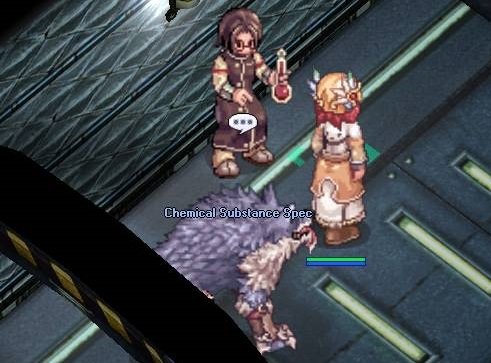
- Return to him once you are done collecting and he will ask you to deliver the grapes to a department:
- Chemical Substance Team: Talk to Karsten (just south of the room with Dr. Fresa) and he will reward you with 5 000 000 Base Exp and 5 000 000 Job Exp.
12.2 Air Cleaning Unit
- Talk to Mechanician Mugeosi and he will ask you to deliver heavy Air Purifier Boxes. He will give them to you one by one so you'll have to return to him after each delivery (each box will weight 1000). If you have extra weight, you can take a few.
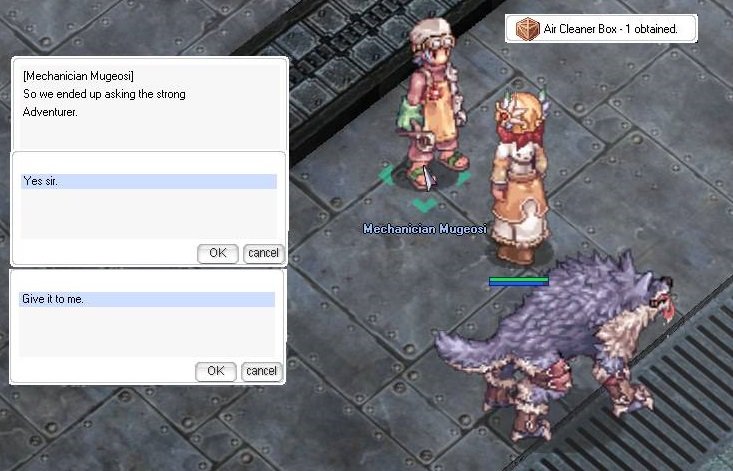
- You'll need to deliver the boxes to the different Facility Managers of each zone:

- F-1
- F-2
- C-0
- Z-0
- I-0
- Return to Mugeosi, receive 5 000 000 Base Exp and 5 000 000 Job Exp.
12.3 Help Her
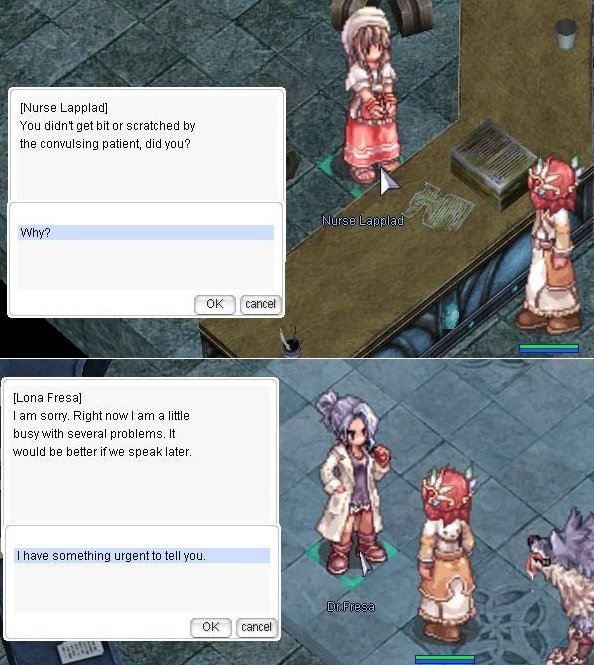
- Talk to Bunker Sayhu. He asks us to go help Dr. Fresa.
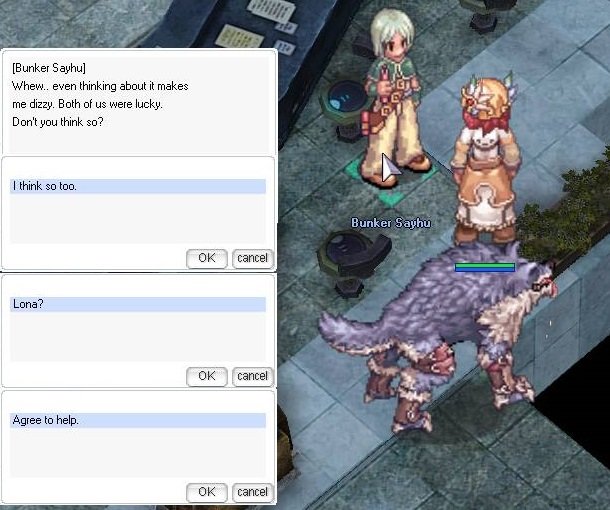
- Talk to Dr. Fresa, She will ask you randomly to count one of following survivors.
For my example, she assigned me an NPC Karsten. Each NPC can give its task.
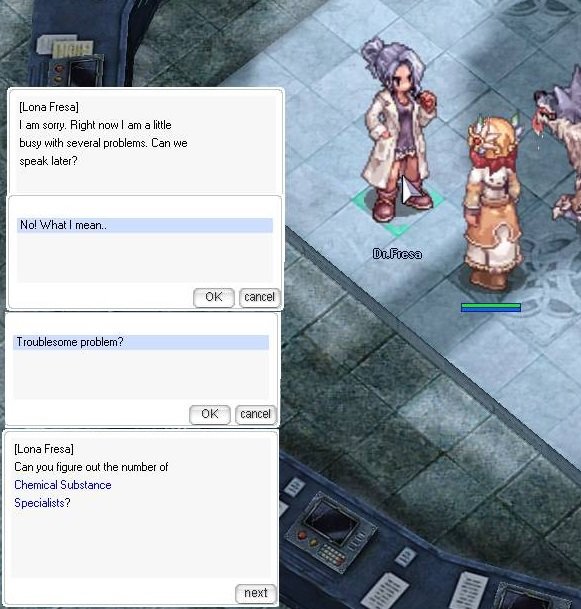
- Talk to Karsten.
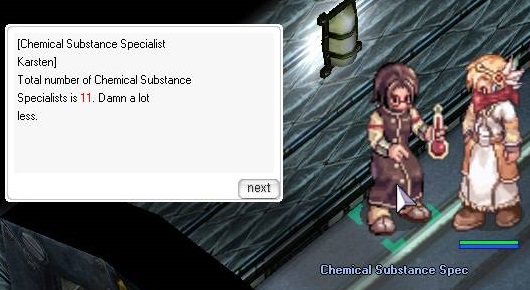
- Return to Dr. Fresa, receive 3 750 000 Base exp + 3 750 000 Job exp.
12.4 Convulsing Patient Suppression
- Talk to Nurse Lapplad and she'll ask you to take care of the convulsing patients around.
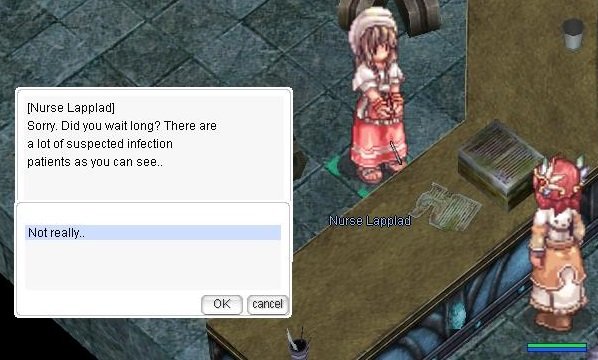
- Kill the Convulsing Patients around.
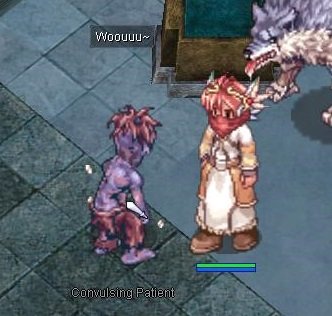
- Return to Nurse Lapplad and she will ask you to return to Dr.Fresa to report the situation, receive 3 750 000 Base exp + 3 750 000 Job exp.
12.5 Transport Necessities
- Talk to Transportation Executiv, he'll requests you to communicate with the Distribution Chief Avra (Z-2).

- Then talk to Mechanician AI
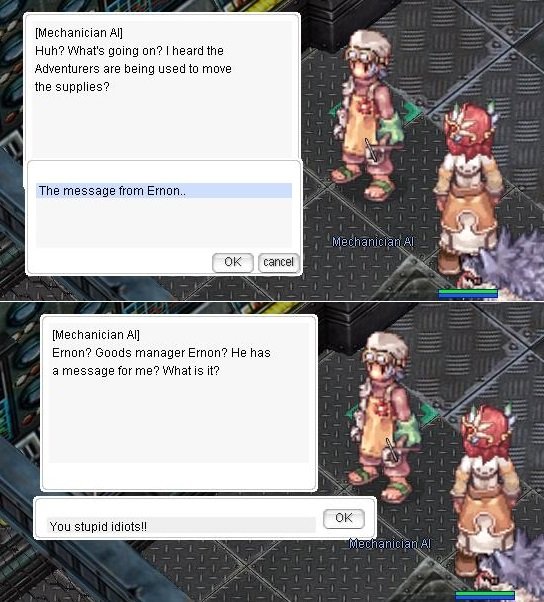
- Return to Transportation Executiv, receive 3 750 000 Base exp + 2 500 000 Job exp.
13. Bard's Story
-
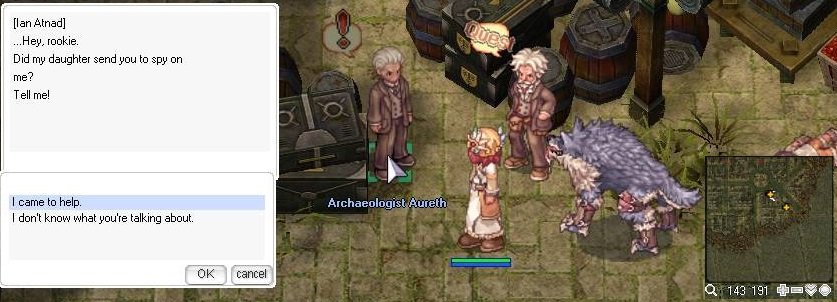
1. Talk to Ian Atnad and he will ask that you check the research facilities for anything out of the ordinary.
2. Walk north of Verus, to enter the Center Plaza.
3. Then walk north of Center Plaza, to enter Research Building-WISH.
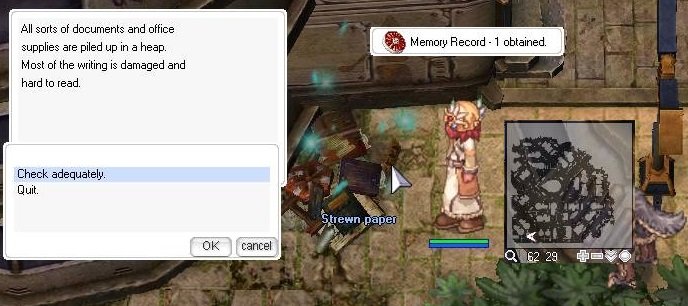
4. Check Strewn paper and you'll obtain a Memory Record
 .
.
5. Return to Ian Atnad and he'll ask you to fetch the Record Player from Commander Arquien
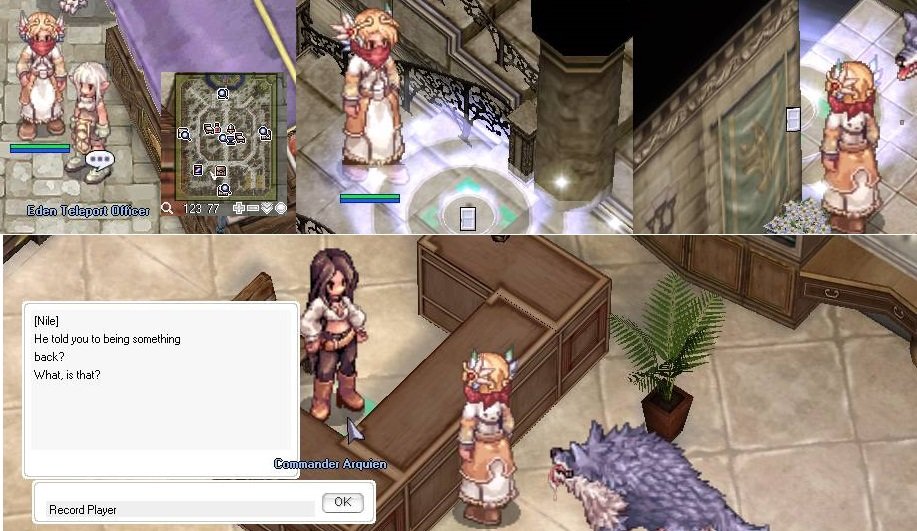
6. peak to her again and she'll inform you that she needs 5 more Memory Record
for it to work. Move to Research Building-WISH to collect - 60 29
- 42 36
- 29 128
- 51 236
- 80 129
- 102 135
- 160 150
- 156 64
- 124 85
7. After collecting the 5 x Memory Records
, speak to Commander Arquien
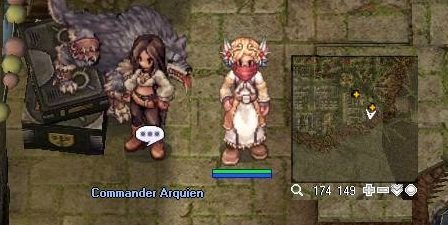
8. She'll ask you to play it yourself, so click the Record Player to the left of her to hear the recording.

9. Speak to her again and she'll direct you back to Ian Atnad. Receive 3 750 000 Base exp + 2 500 000 Job exp.
10. Return to Ian Atnad and you'll discover he is a descendant of Verus.
- Tell him about the content of the Memory Record
- He asks you to obtain some Memory Records from the laboratory in the map North-West of Verus Center Square.
11. Proceed to Laboratory-OPTATIO northwest of Verus Center Square
12. Speak to Verity
- She will warp you to the Under Bunker.
13. When you arrive, search the area for strange glowing objects that look like the Strewn Paper you collected the Memory Records
. First kill the monsters around you, so as not to interfere with the assembly.
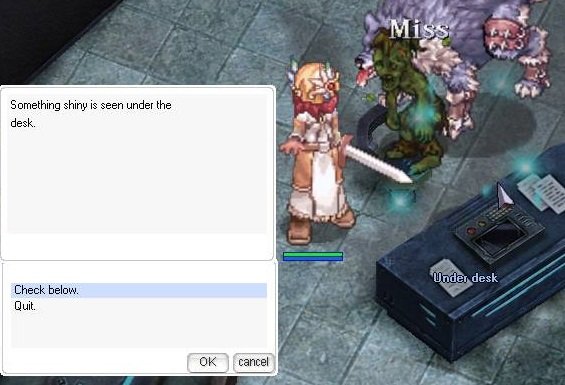
14. After collecting 5 x Laboratory Memory Record
return to Commander Arquien in Verus. She will tell you to listen to the recording again. You will receive a Record Fragment 
15. Speak with Commander Arquien, again. Receive 3 750 000 Base exp + 2 500 000 Job exp. Access to daily quest Collect Memory Records of Research Facilities and Collect Memory Records of Laboratories.
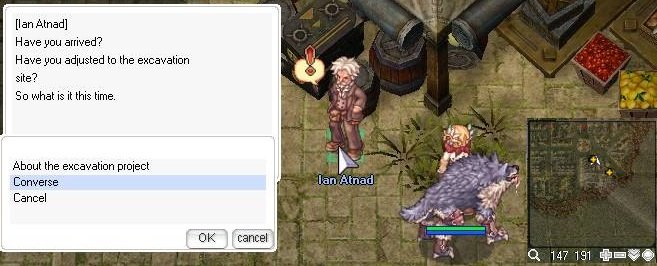
16. Talk to Ian Atnad.
- About the Memory Records
Then
-
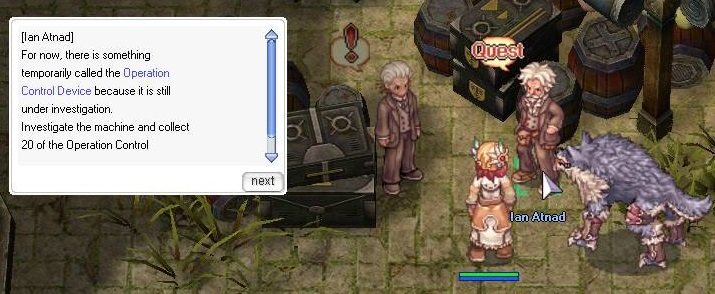
About the excavation project. Accept the 20 x Power Control Device
 collection quest.
17. Move to Central Plaza and hunt the monsters.
18. After collecting 20 x Power Control Device
return to Ian Atnad. Choose 'About the excavation project'. Receive 7 500 000 Base exp + 5 000 000 Job exp.
19. Upon completion of the main quest, Ian Atnad will request that you meet him and the founder of Rekenber in Lighthalzen.
Apparently to get this request, the player have to do the Core Collection(daily), step 16 a few times (2 ~ 10)
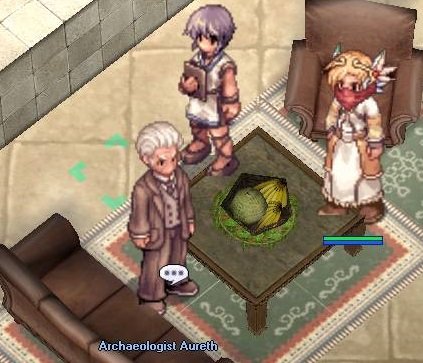
20. During the quest Core Collection(daily) talk to Archaeologist Aureth. You will receive a
 Excavator Report (low chance )and bring it to Commander Louis. Receive 1 500 000 Base exp + 1 500 000 Job Exp.

21. After you have completed quests Core collection a few times (2 - 10). Ian Atnad will tell you:
22. Head over to the Rekenber Corporation Headquarters in Lighthalzen and enter the house. Go up stairs following the red carpet, then first turn to the right until you reach the President's room.
23. Talk to the Rekenber Guard, to enter the room.
24. Then speak with Rekenber Chairman.
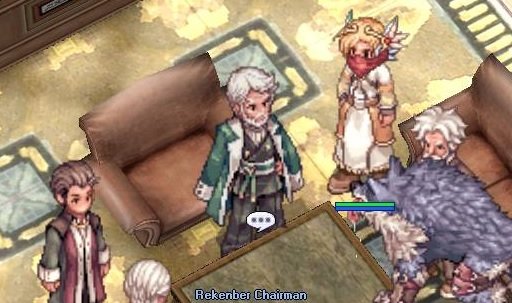
25. Then speak with Ian Atnad.
26. Then speak with Chief secretary. Receive 22 500 000 Base Exp + 15 000 000 Job exp.

-
1. Talk to Archaeologist Aureth.
2. Talk to Ian Atnad. He will ask that you gather 20 x Power Control Devices
 to prove yourself.
- The Power Control Devices will be randomly added to your inventory when you kill the robot monsters around Verus.
- If you return with more than 20 in your inventory, he will take them all, but since these are character bound to begin with it doesn't matter.
3. Move to Eastern Ruins of Juperos and hunt the monsters.
4. After collecting handing them over to Ian Atnad. Receive 3 750 000 Base exp + 2 500 000 Job exp.
5. Speak to Archaeologist Aureth and he will ask that you speak with Machinist Lloyd in Verus Center Square.
- Walk to north part of Verus
6. Machinist Lloyd (verus03 103, 177) will ask you to collect condensed energy from the nearby machine remnants.
7. With 10 x Empty Bottles
 in your inventory, collect 10 x Enriched Energy
  from nearby Machine Remnants and deliver them to Machinist Lloyd.
- verus03 126 142
- verus03 102 180
- verus03 205 200
- verus03 219 196
- verus03 259 193
- verus03 199 180
- verus03 207 115
- verus03 54 78
- verus03 24 74
- verus03 41 121
- verus03 62 120
- verus03 44 195
- verus03 124 61
- verus03 168 229
8. Return to Archaeologist Aureth and he will give you a Excavation Report
 that he compiled and ask that you deliver it to Commander Louis.
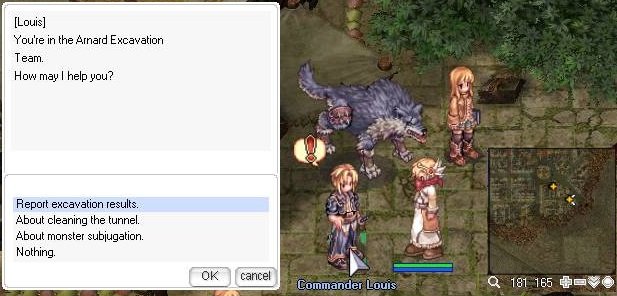
9. Speak with Commander Louis (verus04 179 165), report the excavation results to him. Receive 1 500 000 Base exp + 1 500 000 Job exp.
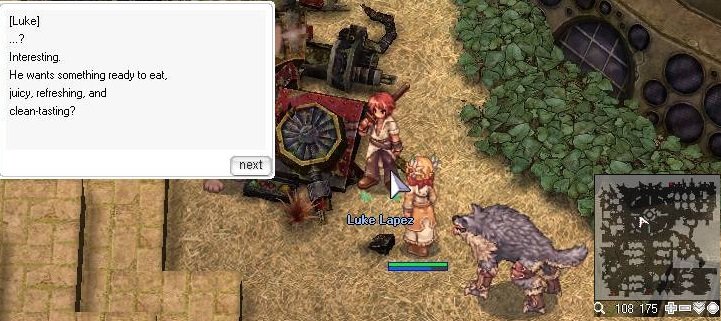
10. Speak with Ian Atnad again and he orders you to bring him some delicious delicacies.
- You will need to consult with other members of the excavation team to find out what he wants.
11. Find Luke Lapez (verus03 107 177) in Verus Center Square and he offers to cook some food if you bring him some ingredients.
-
2 x Meats

-
1 x Banana

-
1 x Mora Mandarin

12. Return to him with the ingredients and he creates a Bifrost
 for you.
13. Deliver the Bifrost
to Ian Atnad and ask him about the last exploration.
- He asks that you give him some time to collect his thoughts.
14. Speak to Ian Atnad again. Now you will have access to the Research Facilities map area, also access to Central Laboratory instance.
-
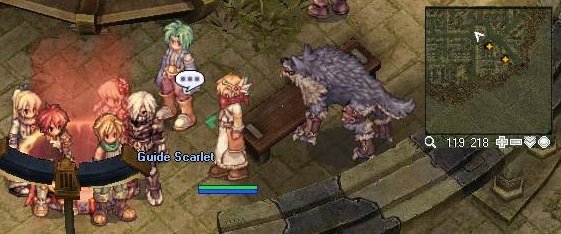
1. In Verus, speak to Guide Scarlet (verus04 119 220).
- You will find that Deu, Alf, Mark, Tamarin, and Magi are on the elevator when it begins to collapse.
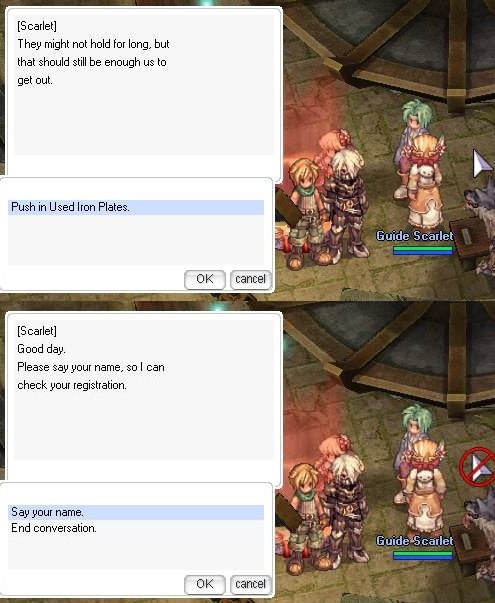
-
She will request for you to bring her 30 x Used Iron Plates
 to help support the elevator.
2. Return to her with the items and repair the elevator.
3. The elevator is now available for use to bring you to and from the surface (Juno Field 7).
-
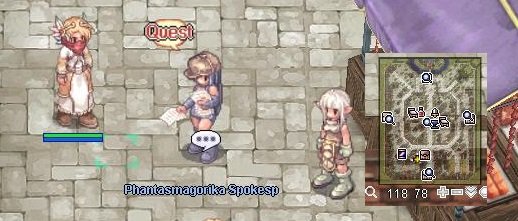
1. Talk to Phantasmagorika Spokesp
- Phantasmagorika ?
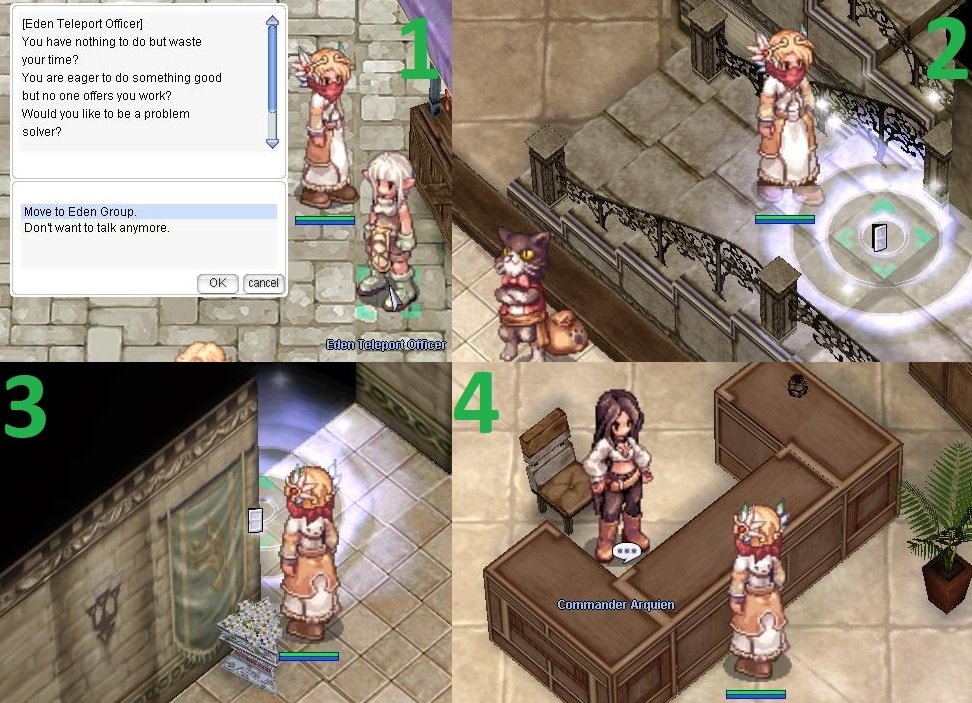
2. Move to Eden Group and talk to Commander Arquien the founder of Eden Group.
- What brings you to see me?
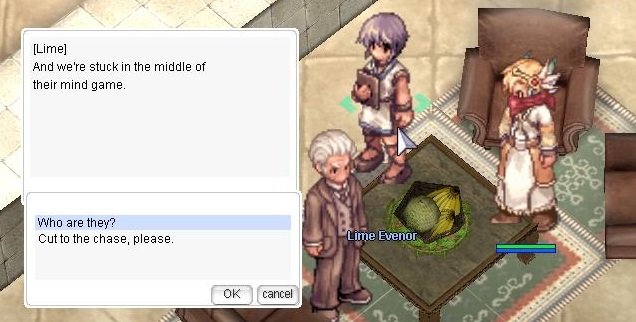
3. Proceed to the room to the right and speak to Lime Evenor
4. She'll introduce you to Archaeologist Aureth and suggest you move to the excavation site.
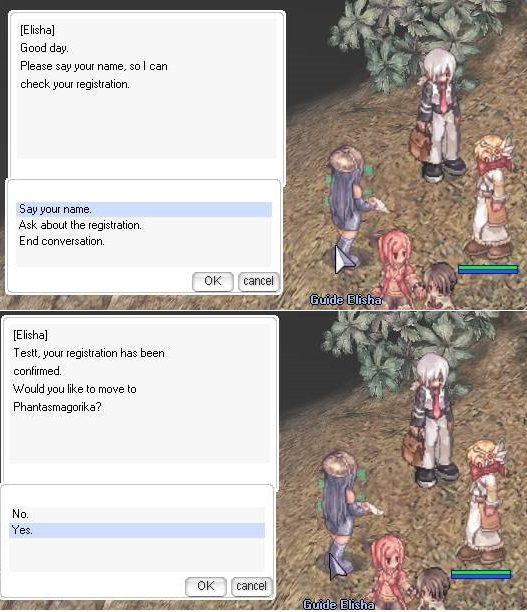
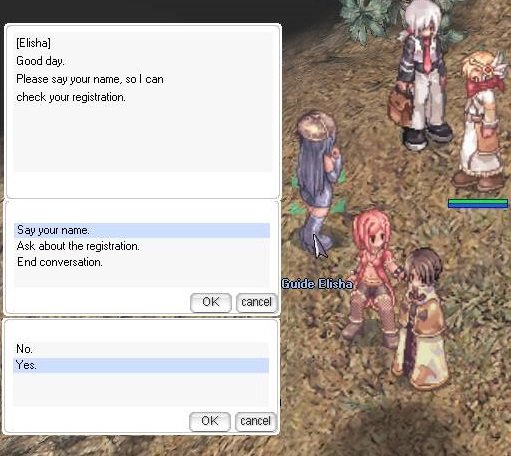
5. Speak to Guide Elisha (yuno_fild07 216 157) in Juno field.
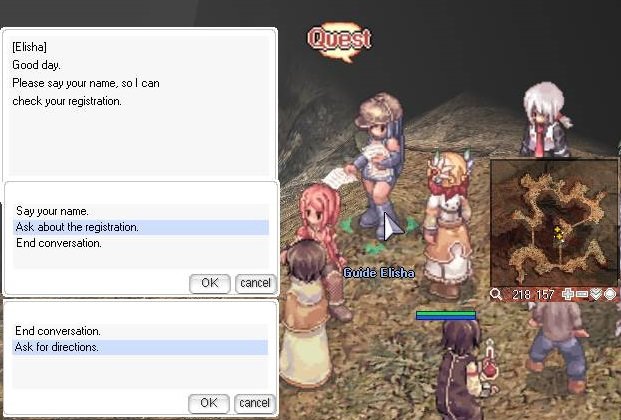
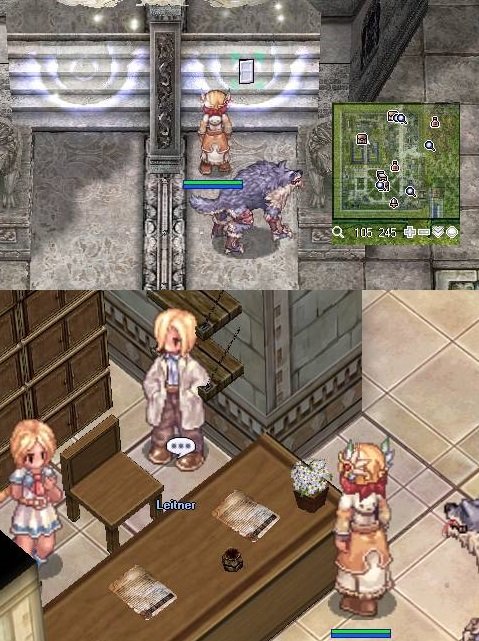
6. Proceed to the Rekenber Headquarters in Lighthalzen and speak to Leitner (lhz_in01 75, 205) behind the counter on the first floor west of the main desk. He will register you and allow you to use the elevator to the Verus Findspot.
7. Return to Guide Elisha and say your name. She will attempt to send you to the Verus Findspot, but the elevator appears to be out of order.
8. Proceed to Juperos Ruins 1 (juperos_01 244 87) and go to the excavation site to the southeast of the map .
9. In the next map Eastern Ruins of Juperos speak to Rekenber Guard, he will mark your exist in the mini map.

10. Upon arrival to Verus, talk to Receptionist Nara (verus04 182 168). Receive 1 500 000 Base exp + 1 500 000 Job exp.
11. You have now access to Eliminating Risks and Verus Daily Quest.
-
Quest Prerequisite(s): Isle of Bios ---> Morse's Cave
Quest to enter: Caged God
1. Talk to Commander Hibba Ag?i?p (moro_vol 108 88) and Adjutant Abidal (moro_v?ol 110 90?) to take the two quests to finish Satan Morocc. Flame Basin Instance Daily Quests
2. Talk to Guardian Nidhogg inside the cave, then check Yggdrasil Lookalike (moro_cav 43 73), reserve and enter dungeon.
!!! Be sure party members are prepared for this dungeon wit?h Token Of Siegfried
 .?? The MVP at this dungeon is highly difficult.
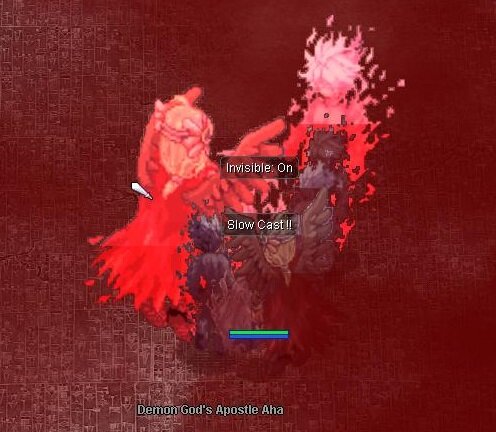
3.Talk to Demon God's Apostle Aha
.?? The MVP at this dungeon is highly difficult.
3.Talk to Demon God's Apostle Aha Check the inventory spot, otherwise you will not receive the item !
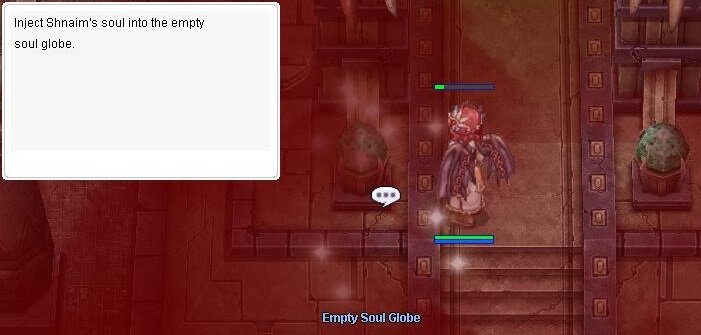
4. Defeat the furious version of Morocc Incarnation. You will get Soul of Ahat
 and Soul of Shnaim
  . At top center of the room, put each soul into the orbs to open the door to central room.

5. At top center of the room, put each soul into the orbs to open the door to central room.
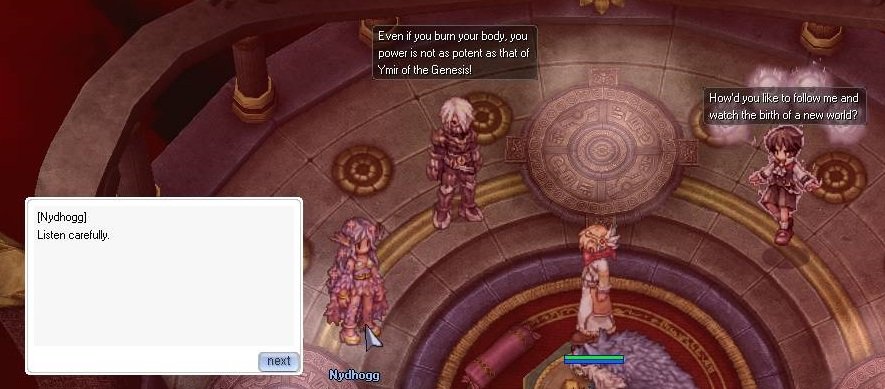
6. In the next room, Morocc in boy form will greet you, and conversation will happen when Loki and Nidhogg join in.
After that, a portal will appear to the left. Talking to Nidhogg, she will grant you Nidhogg mercenary.
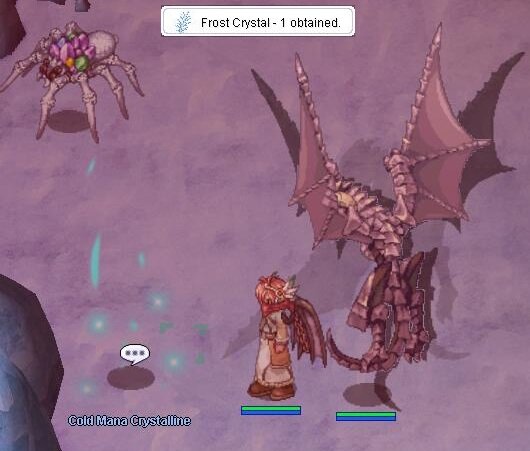
7. In this room, kill the Brinaranea. Once killed, every party member must talk with Nidhogg and a portal leading back to central room will appear.
*note:
- If you deal more than 10 million damage in 3 seconds, it will completely restore its life.
- Be sure to collect frost crystals. You will need them for the next stage.
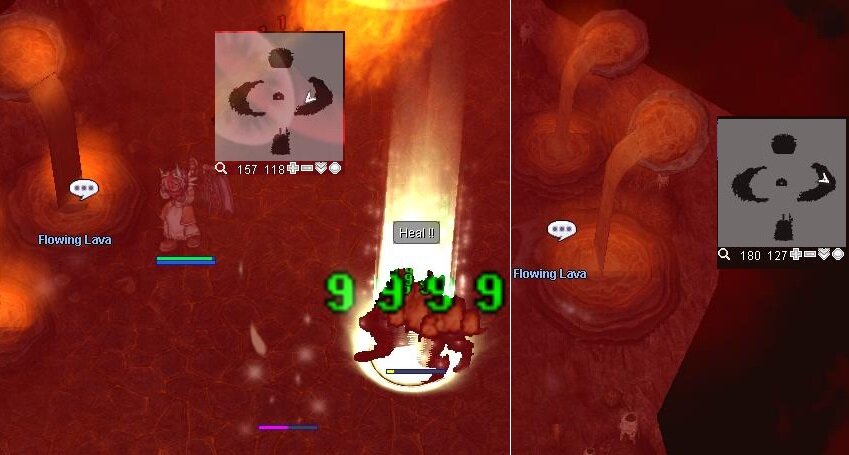
8. Morocc will talk again, then a portal on the right will be opened. In this room, kill Muspellskoll . Once defeated, talk to Nidhogg again and portal to central room will appear.
Here you will need from the first stage frost crystal. You will need to extinguish the fire pools, once every 2 minutes.
9. Morocc in Adult Man form will talk and open portal at the top. In this room, you will fight Morocc in Boy form Demigod.
*note - If you deal damage more than 20 million times in 6 seconds, then the demigod will heal for a certain difference in value.
10. Once defeated, Morocc in Adult Man form De?spair God Mo?rroc will appear which you need to be defeated.
11. Once defeated, talk to Nidhogg again and you will be transported on Flame Cave.
-
Quest Prerequisite(s): Dimensional Travel , Isle of Bios
Quest Reward(s): Access Temple of Demon God, 2 x Prize Of Hero
 , 1 x Heroic Token
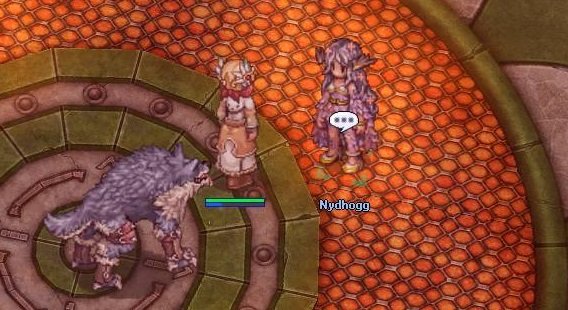
1. Talk to Senior Tracker (moro_cav 61 69).
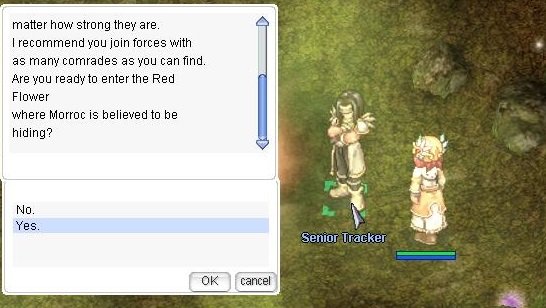
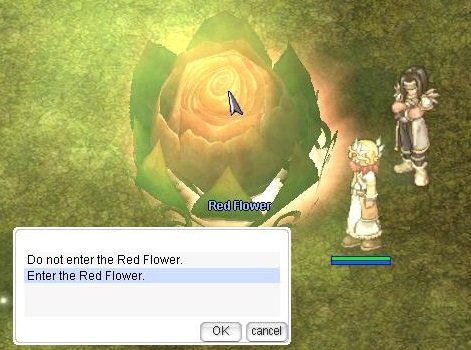
2. Talk to Red Flower (moro_cav 50 64) enter the dungeon.
3. In the first room, you need to kill all 9 x ghouls, then Grim Reaper Ankou will appear and talk.

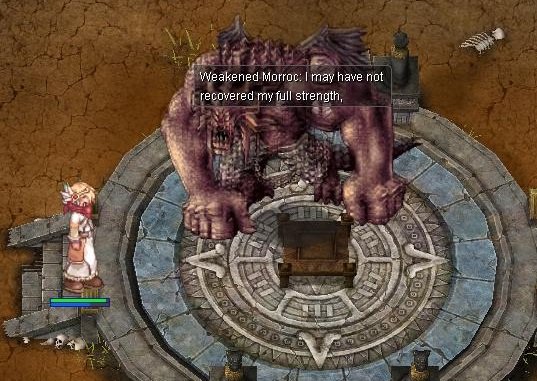
4. In the second room, you will fight Weakened Satan Morroc
5. After the talk, you will pass two rooms where you will need to kill monsters. You will be trapped in ice wall (using Back Slide
 , Front Slide
  , Dark Illusion
  will let you out of the ice wall) while a swarm of mobs will attack.
- If you play with friends, your party will be split into two teams. Make sure both teams are able to finish the task, since if one team fails, the whole party will fail and be moved to Prontera.
- In the next room, your party will be reunited again, and still trapped in ice wall. The situation is similar to third room. Swarm of mobs and need to kill certain amount to complete.
6. In the fifth room, a Morroc Necromancer will appear.
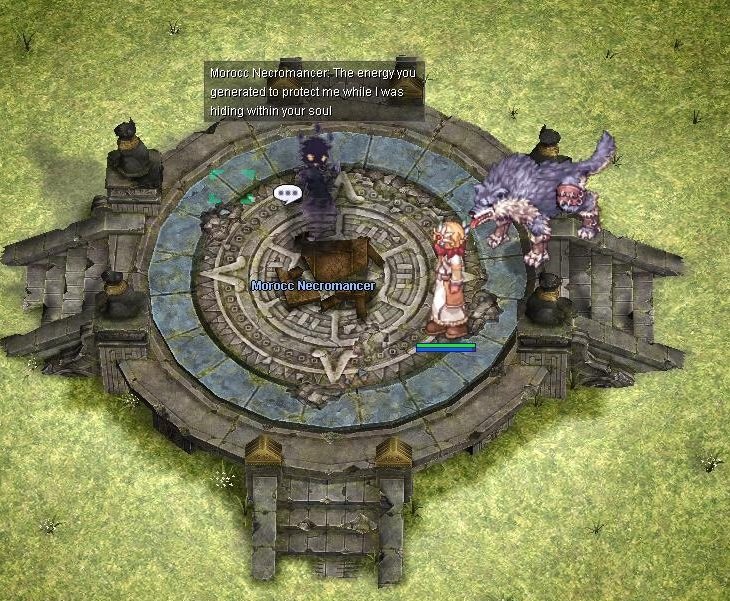
7. After you kill it, the Morroc Necromancer will transform into his true form.
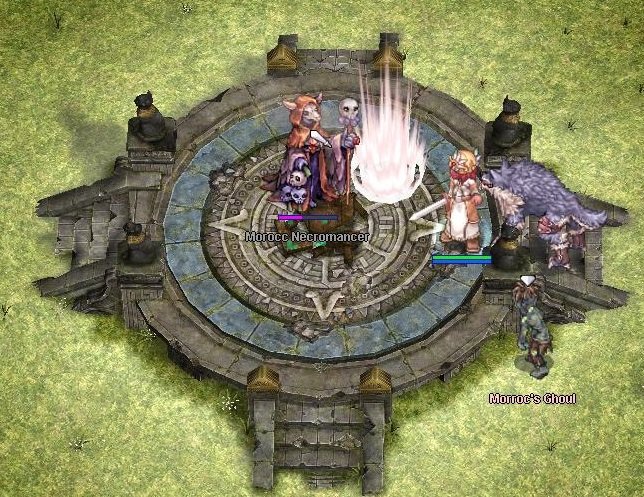
8. Once his HP reach 3m, he will speak 'you can never kill me'. At this rate, you need to kill him within 30 seconds.
9. After killing, a dimensional device will appear and move you to the flame cave. Talk to Senior Tracker again and start the cooldown timer.

-
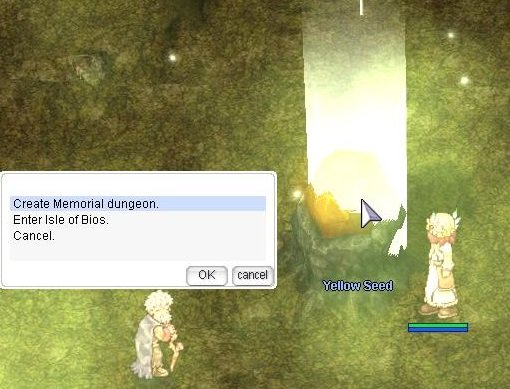
Quest Prerequisite(s): Dimensional Travel
Quest Reward(s): Access Morse's Cave, 1 x Prize Of Hero
, 1 x Heroic Token 1. Talk to Tamarin and enter the flame cave.
2. Talk to Wandering Old Man (moro_cav 45 60).

3. Check the Yellow Seed (moro_cav 50 64), choose create and enter dungeon.
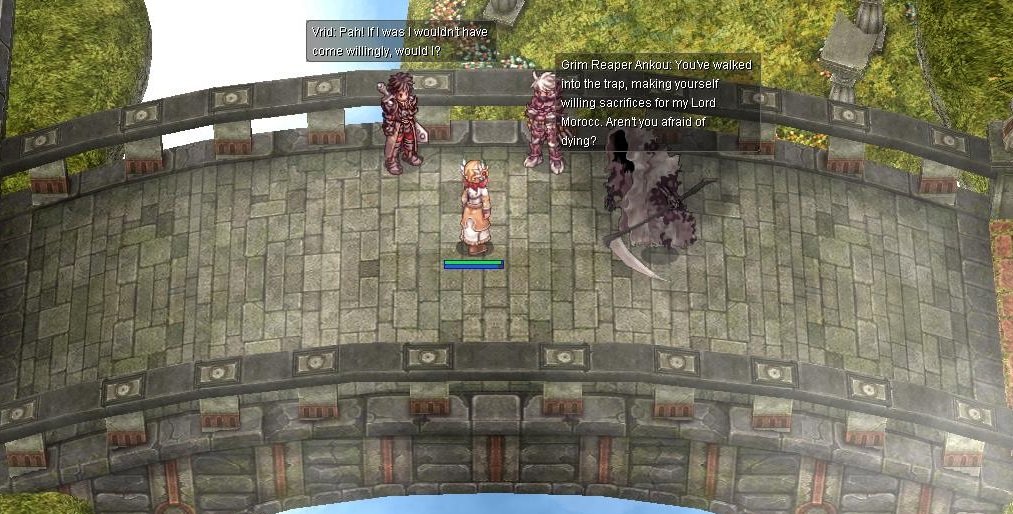
4. Inside the dungeon walk east to the bridge. There will be a conversation between Vrid, Zeith and Grim Reaper Ankou.

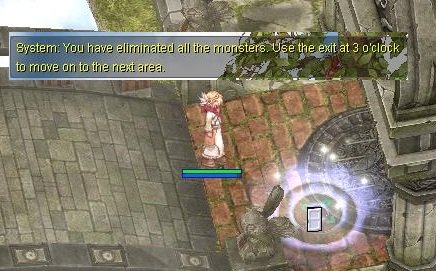
5. You need to kill all monsters in the zone to be able to move to the second zone. An announcement will show if all the monster has been killed. On the second zone, you also need to kill all monsters to be able to move to final zone.
6. On the final zone, head to the center of the room where you will see Vrid and Zeith. Grim Reaper Ankou will appear and freeze everybody.
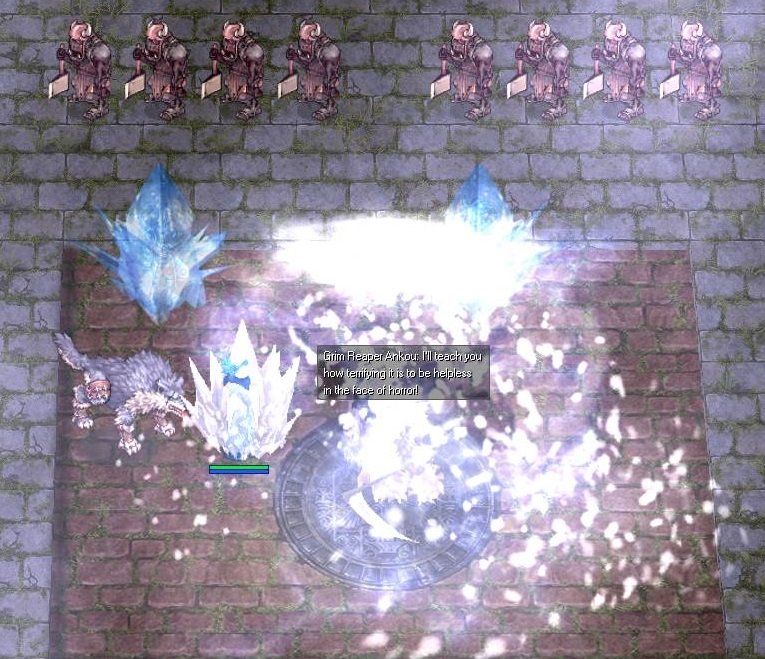
7. There will be a wave of Orc Zombies, followed by Verit and Megalodon that you need to kill.
8. Once all undead wave has been cleared, Grim Reaper Ankou will appear and you can kill him now.
9. Once done, talk to Vrid again
-
1. Caged God
Quest Prerequisite(s): Isle of Bios / Morse's Cave
Quest Reward(s): 5 000 000 Base exp + 2 500 000 Job exp, 1 x Expedition prize box

1.1 Talk to Commander Hibba Agip (moro_vol 108 88).
1.2 Enter Temple of the Demon God and hunt Despair God Morroc .
1.3 Return to Commander Hibba Agip to receive 5 000 000 Base exp + 2 500 000 Job exp, 1 x Expedition prize box
2. Unending Hunt ( This quest can only be accepted after you take the quest Caged God ).
Quest Prerequisite(s): Isle of Bios / Morse's Cave
Quest Reward(s): 1 x Expedition prize box
2.1 Talk to Adjutant Abidal (moro_vol 110 90).
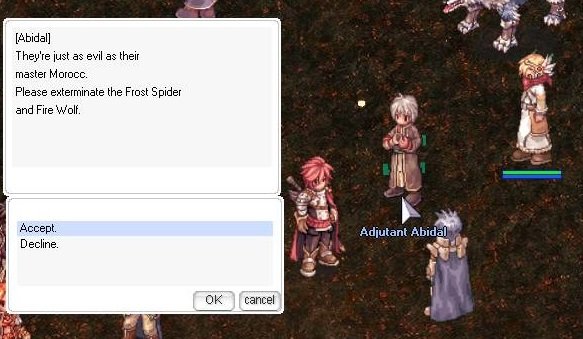
2.2 Enter Temple of the Demon God and hunt Muspellskoll + Brinaranea.
Note: Players can still receive this reward even if the player did not finish the instance/not able to kill morroc, as long as both of that hunt is completed.
2.3 Return to Adjutant Abidal to receive 1 x Expedition prize box
.
3. Wandering orb magic (This quest can only be accepted after you take the quest Caged God)
3.1 Talk to Hishieh. Ask you to collect resources (3 x Mana White / 3 x Mana of Life / 3 x Mana of Earth) in the Temple of Demon God.
Mana random spawn 2-4!


3.2 After collect, return to Hishieh. Receive 5 000 000 Base exp + 2 500 000 Job exp, 1 x Expedition prize box
-
1. Eliminating Risks (24h) ( very important !!! look into the second quest )
Quest Prerequisite(s): Dimensional Travel
Quest Reward(s): 5 000 000 Base exp + 4 000 000 Job Exp
1.1 Talk to Instructor Ingrid (moro_vol 111 87) and he asks you to hunt the 3 x champion morroc monsters .
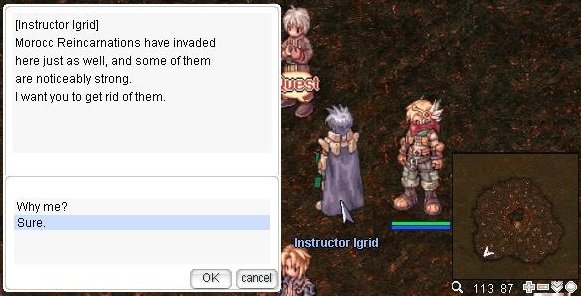

1.2 After killing report to Instructor Ingrid.
2. Collecting Mana (24h) ( to complete this quest, you need to take the quest Eliminating Risks. Lets go to kill monsters and collect mana stones, then we give the Magic Scholar stones, and then go to Instructor Ingrid ) !
Quest Prerequisite(s): Eliminating Risks
Quest Reward(s): 1 750 000 Base exp + 1 750 000 Job Exp
2.1 Talk to Magic Sholar (moro_vol 98 107), asked to collect 3 x Mana crystal
 . Dropped by aura champions morroc (step 1) 50%.
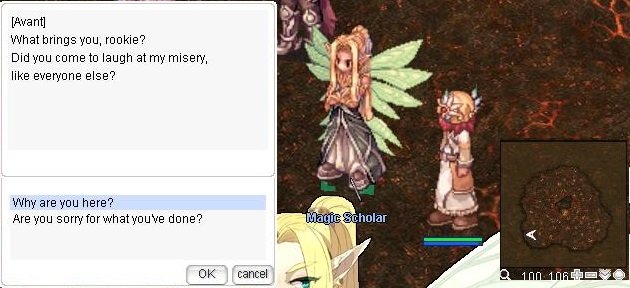
2.2 After collecting, deliver the Mana crystal to Magic Sholar.
3. Rampaging Box (24h)
Quest Prerequisite(s): Doha's Secret Orders
Quest Reward(s): 5 500 000 Base exp+ 5 500 000 Job Exp
3.1 Talk to Jeruth Hesranta ( moro_vol 136 84). Player will receive 1 x Sapha Certification

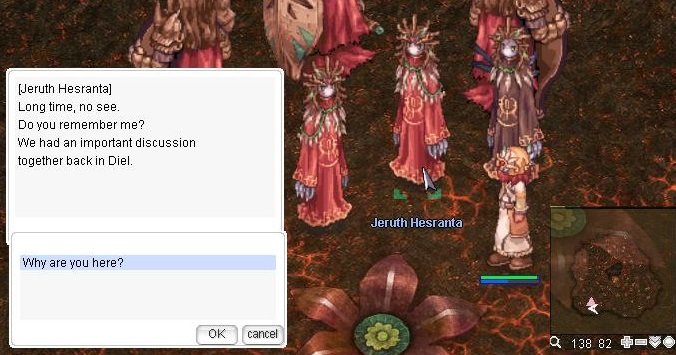
3.2 Talk to Jeruth Hesranta again, asked to search box.
3.3 Kill 1 x Angry Mimic. After killing report to Jeruth Hesranta, asked to request again. Receive 1 500 000 Base exp + 1 500 000 Job Exp.
3.4 kill 10 x Angry Mimic and get 10 x Bradium Box
 .
.
3.4 Deliver box to Jeruth Hesranta. Receive 4 000 000 Base exp + 4 000 000 Job Exp, 1 x Sapha Certification
-
1.
In progress -
Quest Prerequisite(s): Onward to the New World
Quest Reward(?s): Access Flame Cave + 7 500 000 Job Exp
Note: You can drag any monsters to soldiers standing guard on lower left side of the map to make those soldiers use skill and teleport the monsters.
1. Go to Morroc and lift the Piled Rags off the guy (morocc 137 238). Give him a 1 x Monster's Feed
 . His name is Tamarin. Tell him about where to bathe, and then accompany him to the oasis.
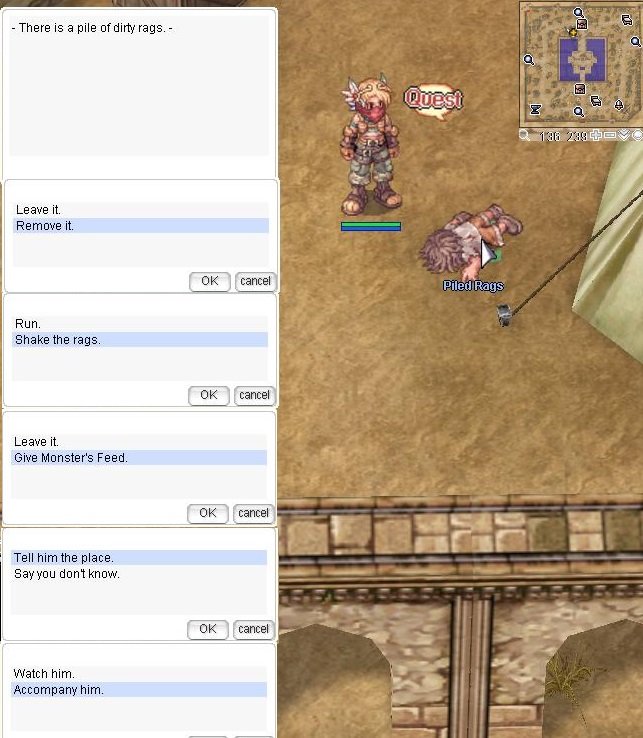
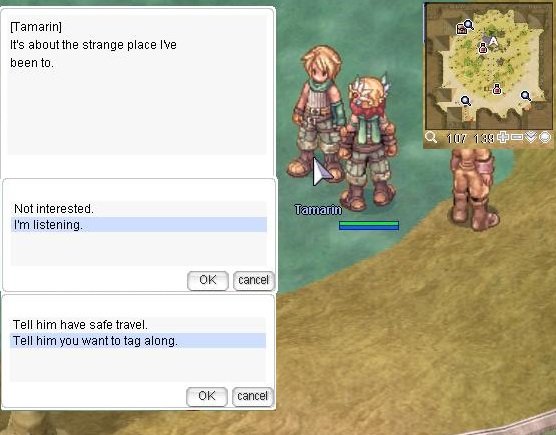
2. Find Tamarin at the oasis (moc_ruins 107 139). Tell him I'm listening and he'll tell you a story about his adventure in the Dimensional Crack. Tell him you want to tag along and he tells you to go meet him at the Dimensional Gap.
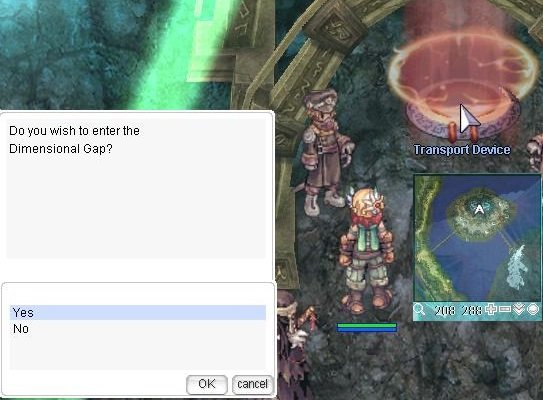
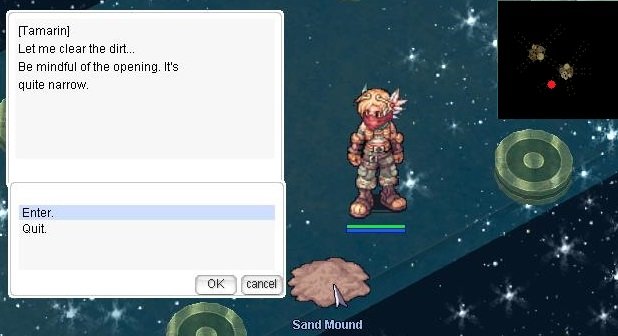
3. Talk to Tamarin in the Dimensional Gap (dali 112 69). He's near the entrance, below the group in the first intersection. He tells you to meet him by the Sand Mound in the 2nd area of the Dimensional Gap, where Devil's Tower and Ghost Palace are located (dali02 88 62).
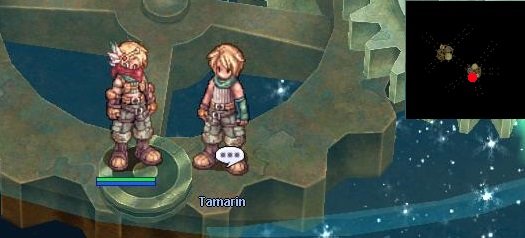
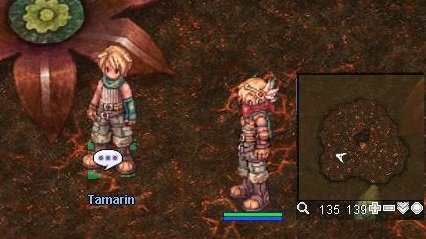
4. Lets go to 2nd area of the Dimensional Gap. Go to Flame Basin and talk to Tamarin near the entrance.

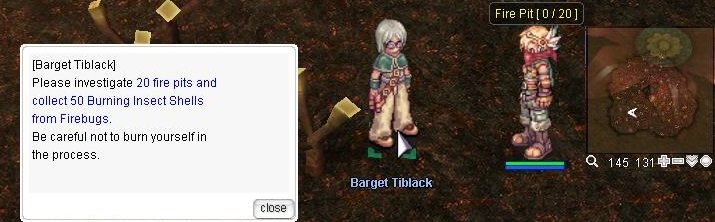
5. Speak to Barget Tiblack (moro_vol 142 131), who asks you to kill 20 x Fire Pits ( 1 x Fire Pits = 3 x Fire Bug) and collect 50 x Burning Bug Skin
 .
.

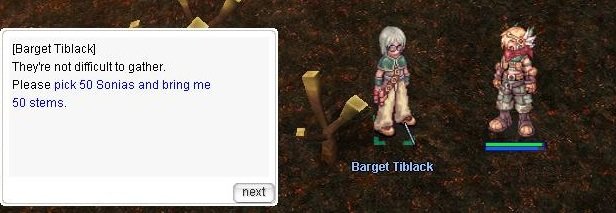
6. Deliver Burning Bug Skin to Barget Tiblack. He asks now to kill 50 x Sonia and gather 50 x Delicious Stem again. ( go to step 7 )
7. However, Tamarin calls you out. Talk to him and you will get the request kill 25 x Sonia and gather 25 x Delicious Stem
 again.
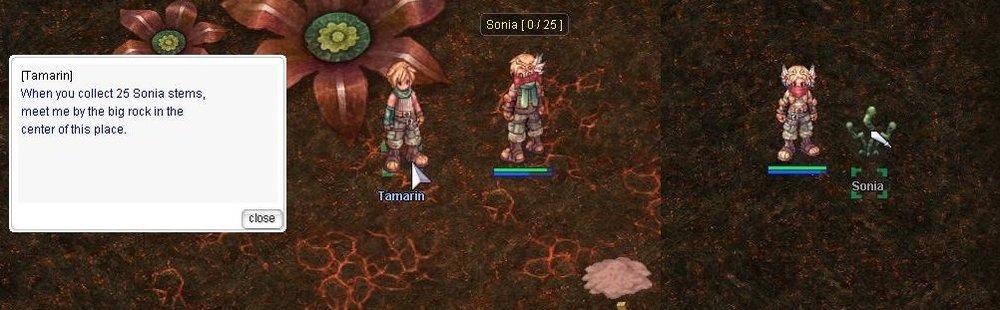
8. After killing 25 x Sonia and collecting 25 x Delicious Stem, talk to Tamarin near the center of the map (moro_vol 198 179).
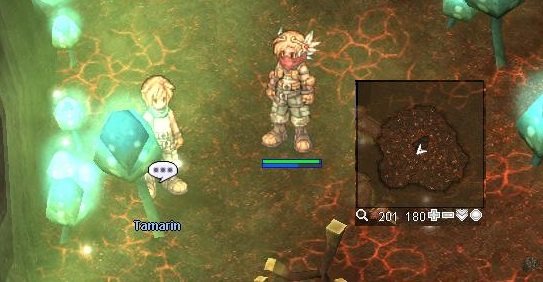
9. Return to Barget Tiblack.
10. Go to Southwest and talk to Instructor Rugen (moro_vol 105 71).
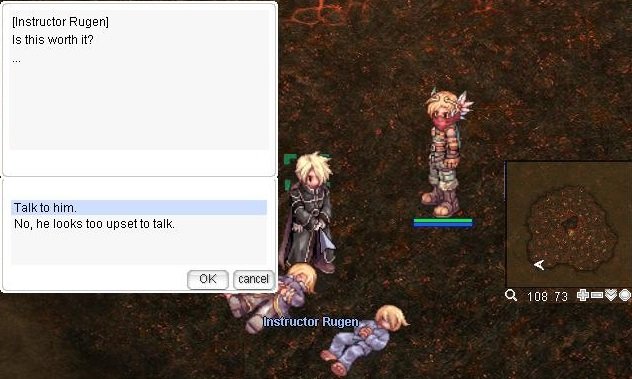
11. Speak to Intoxicated Patient (moro_vol 104 70), right below Rugen.
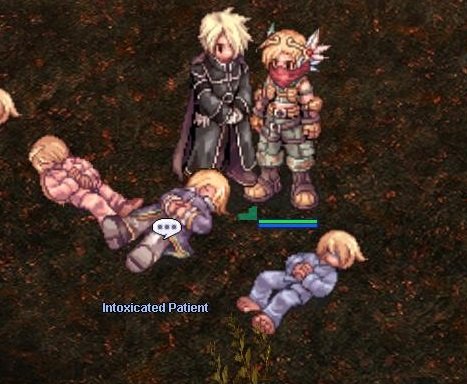
12. Talk Instructor Rugen again.
13. Report to Barget Tiblack. Receive 7 500 000 Job Exp.
14. You can Access Flame Cave by talking to Tamarin in the center of the map!!!


Sky Fortress Instance(145+ Lvl, 3d cd)
in Episode 16.1 The Royal Banquet
Posted
Quest Prerequisite(s): Invitation to Royal Banquet , The Room of Consciousness Instance
1. To gain access to the instance, you must have access to Invaded Prontera. Head to the bottom right corner of Invaded Prontera map and talk to Scientist Doyeon ( prt_q 249 79 ).
!!! Be sure party members are prepared for this dungeon with Token Of Siegfried . The MVP at the end of this dungeon is highly difficult.
2. This instance begins with a copy version of the MVP , Stefan.J.E.Wolf.
3. Speak to him and he will summon waves of Immortal Zombie Soldier on you to test you before access to the rest of the instance begins.
4. Speak to him after you have completed the waves of zombies to open a portal to the spiral staircase portion of this dungeon.
5. The staircase will be filled with trash monsters who have a chance of dropping Sky Fortress Keys .
.
or ver 2. on top floor.
6. The top floor of this dungeon features the real MVP version of Stefan.J.E.Wolf.
7. Once you have defeated the MVP , a portal will open in the middle of the room and take you out to the scientist outside where you first entered.
Monsters:
Immortal Zombie Soldier
Sky Fortress Key Keeper
Immortal Zombie Assault
Immortal Cursed Zombie
Immortal Fortress Legion
Immortal Nightmare Shadow
Immortal Angry Shadow
Immortal Death Shadow
Immortal Cursed Knight
Immortal Wind Ghost
Stefan.J.E.Wolf (MVP)
Vicious Mind Weapons: are dropped from the monsters inside the Sky Fortress instance. Similar to Crimson Weapons, they gain a substantial amount of ATK/MATK with higher refines, up to +15+.
Weapons fall out of monsters already with enchantment.
Heroic Weapons:
Vicious Mind Weapon Enchants:
Vicious Mind Rod [1]
Vicious Mind Two-Handed Staff [1]
slot 1:
slot 2:
slot 3:
Vicious Mind Revolver [1]
Vicious Mind Wire [1]
Vicious Mind Violin [1]
Vicious Mind Bow [1]
slot 1:
slot 2:
slot 3:
Vicious Mind Saber [1]
Vicious Mind Two-Handed Axe [1]
Vicious Mind Mace [1]
slot 1:
slot 2:
slot 3:
Vicious Mind Dagger [1]
Vicious Mind Book [1]
Vicious Mind Huuma Shuriken [1]
slot 1:
slot 2:
slot 3:
Vicious Mind Two-Handed Sword [1]
Vicious Mind Spear [1]
Vicious Mind Lance [1]
Vicious Mind Katar [1]
Vicious Mind Knuckle [1]
slot 1:
slot 2:
slot 3: